Introduction: The Allure of Smooth Skin at Home
I've always been fascinated by the idea of achieving silky smooth skin without having to make frequent visits to a beauty salon. The convenience of at-home Laser Hair Removal devices seems too good to be true. Like many, I wondered if these devices could actually deliver the promised results. Imagine never having to schedule yet another waxing appointment or endure the pain of ripping hair out by its roots. That thought alone is enough to pique anyone's interest.
Growing up, I tried everything from razors to waxing strips, and even those smelly depilatory creams. Each method had its own set of drawbacks. Razors gave me nicks and cuts, waxing was just plain painful, and those creams? Let's just say the scent was less than appealing. These reasons led me to explore Laser Hair Removal.
The Quest Begins
When I first heard about IPL (Intense Pulsed Light) devices, my curiosity was instantly ablaze. Could I really get professional results from a gadget at home? It seemed futuristic and a bit dubious, but various glowing reviews and testimonials online made it worth considering. I took a deep dive into research, reading everything I could find on the subject, because who wouldnt want a life free of unwanted hair?
What Is IPL?
IPL isnt exactly the same as traditional Laser Hair Removal. This technology uses broad-spectrum light, unlike the single wavelength light used in medical laser devices. Here's what caught my eye:
- Convenience: No more salon visits.
- Cost: After initial investment, its cheaper over time.
- Privacy: Say goodbye to potentially awkward salon experiences.
Why I Decided to Try
The tipping point for me was a conversation with a close friend who had tried an IPL device and was thrilled with the results. She had the same concerns and skepticism, which she assured me were unwarranted. Its changed my life, she said, and that was enough to convince me to take the plunge.
With that in mind, I decided to purchase a popular IPL device and put it to the test myself. If it worked, the benefits would be life-changing. If it didnt, well, at least Id have a good story to tell. So, with cautious optimism, I embarked on my journey for smooth, hair-free skin from the comfort of my home.
The Hair-raising Tale: My Journey Into the World of At-Home Laser Hair Removal
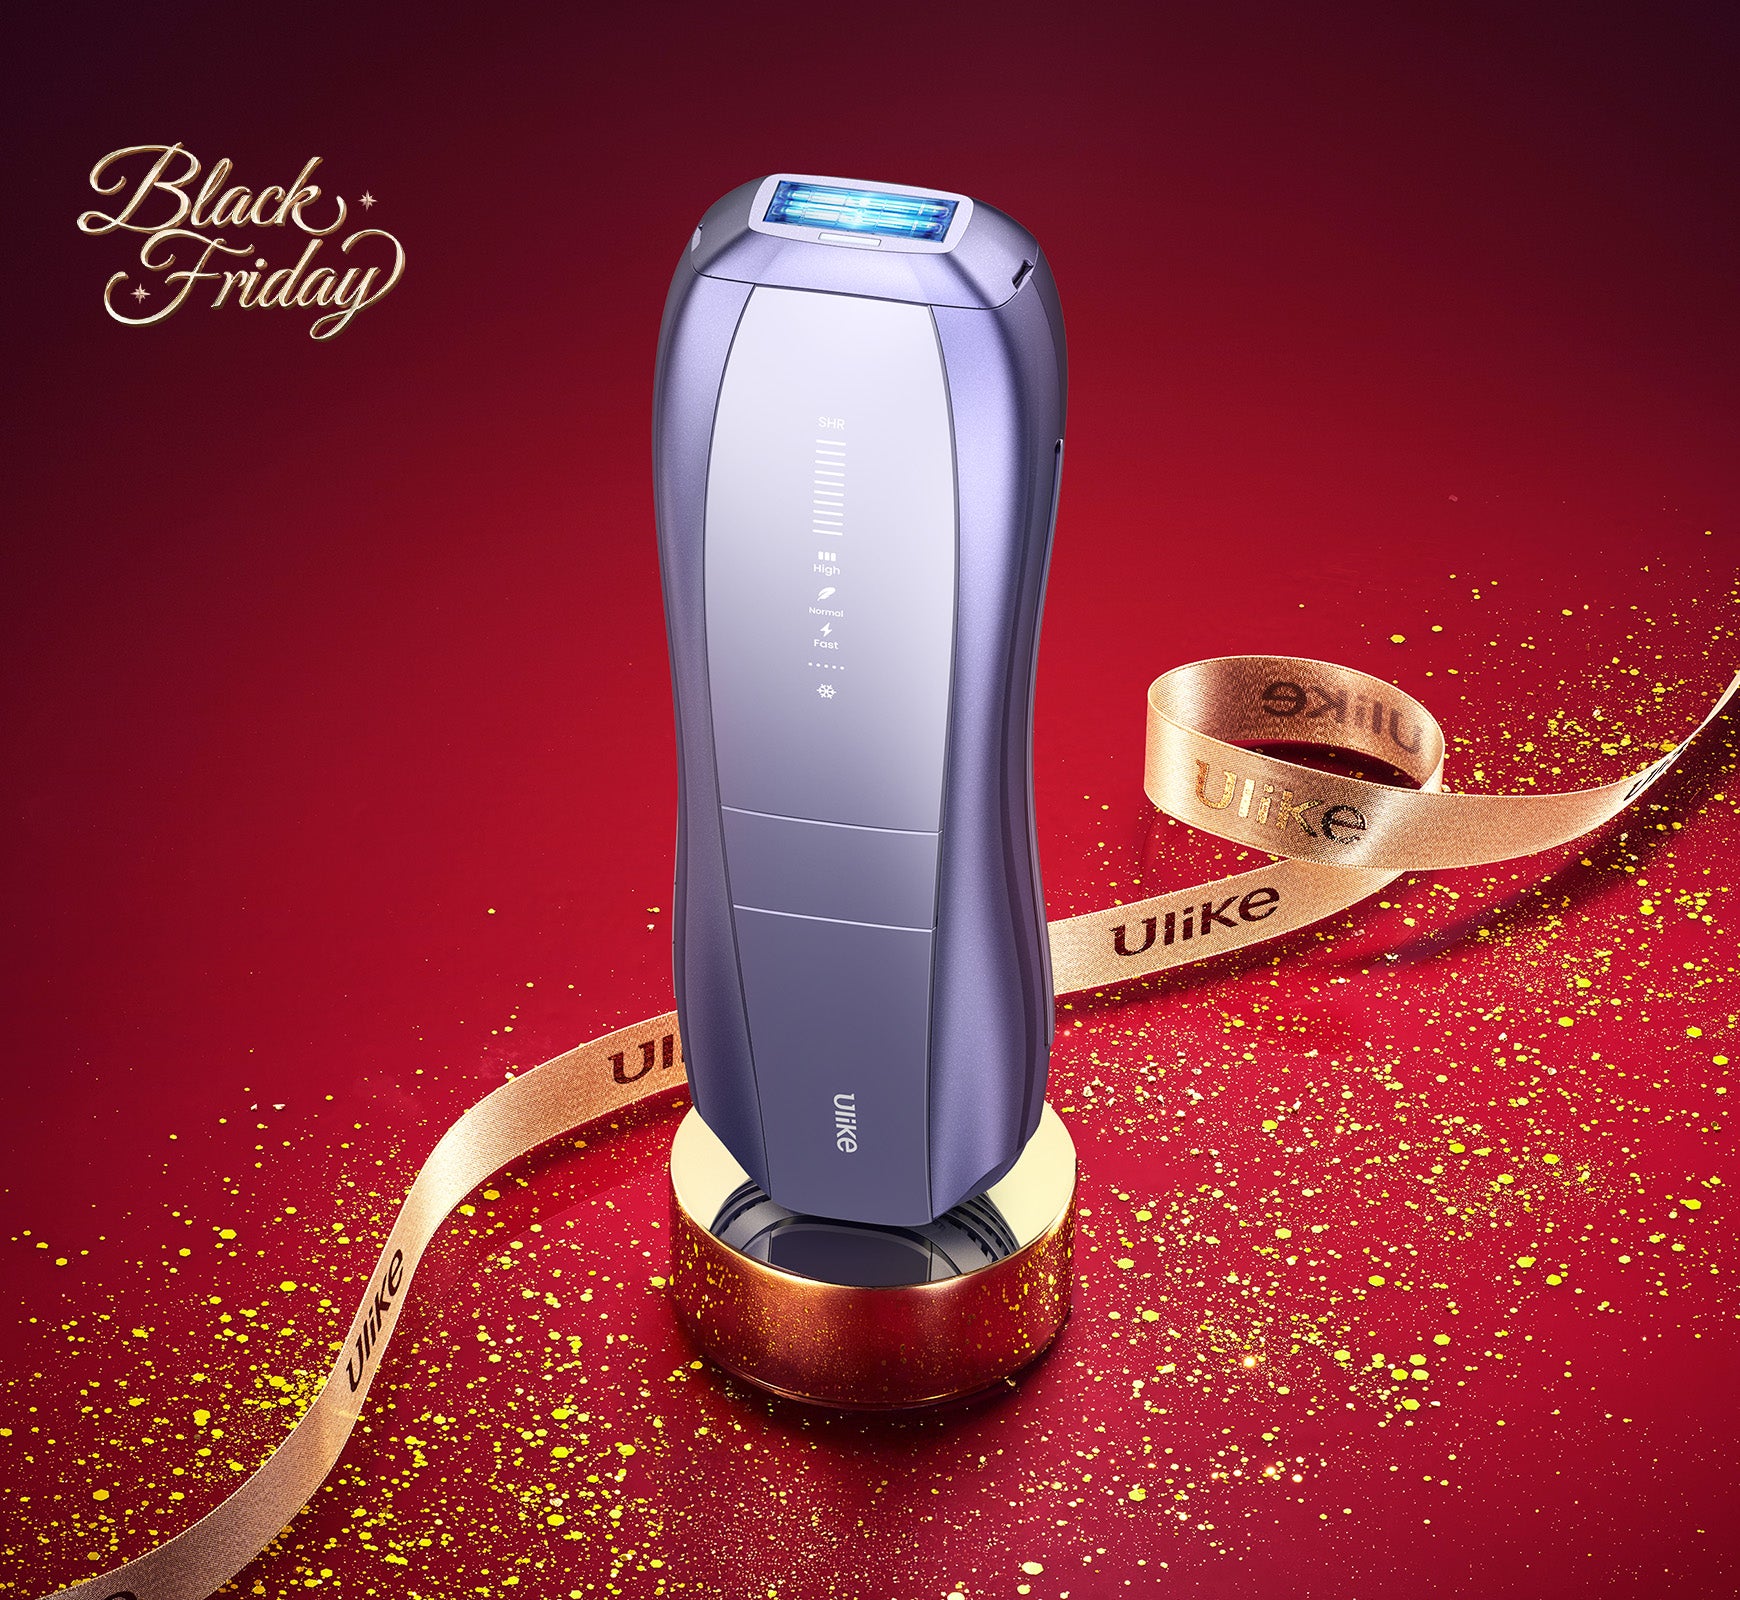
As I ripped open the packaging of my brand-new at-home laser hair removal device, I could feel excitement and a touch of anxiety building up inside me. The sleek, futuristic design of the device promised a revolution, a significant shift from my regular shaving, waxing, and tweezing rituals.
I remember my initial doubts. Could this tiny, handheld gadget tackle my persistent hair issues? Would it be painful, or worse, ineffective? Armed with curiosity and a bit of skepticism, I dived into the instruction manual. Heres how it unfolded:
Day 1: The First Zap
Setting up the device was straightforward. I cleaned the target area, shaved the hair (yes, you need to shave first!), and put on the protective goggles provided. As I pressed the device against my skin and activated the pulse, I couldnt help but flinch at the sharp, warm sensation. It wasnt excruciating, but it was definitely noticeable.
Week 1: Adjusting to the Routine
By the end of the first week, I had already gotten the hang of it. I scheduled sessions twice a week, setting reminders on my phone. This wasn't just about convenience; it was about commitment. Like a scene from a sci-fi movie, I aimed and zapped, each pulse bringing me closer to smoother skin.
Month 1: First Signs of Progress
Four weeks in, I started noticing a reduction in hair regrowth. The tiny prickles of hair were growing slower and finer. Some stubborn patches remained, but the results were encouraging enough to keep me going. Heres what I found made a difference:
- Consistency is key. Skipping sessions reduced effectiveness.
- Proper shaving before using the device improves results.
- Cooling gel applied afterward helped soothe the skin.
Month 3: Transformation Underway
By the third month, the real magic began. More than half of the targeted area showed significant thinning. The once-prompting anxiety now transformed into eagerness for every session. I could already envision a future of ditching razors and waxing strips for good.
What I Learned Along the Way
- Skin Tone Matters: The device works best with light skin and dark hair.
- Pain Tolerance: While generally mild, certain areas felt the heat more than others.
- Patience Pays Off: Results arent instant; persistence is everything.
Looking back, what began as a hair-raising experiment evolved into an empowering routine. Every zap, every flash of light, brought me closer to the smooth, hair-free skin I desired without stepping foot in a salon.
Getting to Know the Technology: What is IPL and How Does It Work?
When I first encountered IPL, short for Intense Pulsed Light, I was intrigued. Think of IPL as a magical flashlight that zaps away unwanted hair. Unlike lasers, which use a focused beam of light, IPL uses multiple wavelengths of light, spreading out like a fan. This broad-spectrum light targets pigment in the hair shaft. Heres how it breaks down:
- Light Absorption: When I use the IPL device on my skin, the light is absorbed by the pigment, or melanin, in my hair follicles. This process feels like a brief, pricking sensation.
- Heat Production: The absorbed light turns into heat. This heat travels down into the hair follicle. It might sound a little intimidating, but I found that it was quite bearable.
- Hair Follicle Disabling: The heat damages the hair follicle, disrupting the hair growth cycle. Consequently, over the treatments, the hair thins out and eventually stops growing. The gradual decrease in hair growth was incredibly satisfying to witness.
I was fascinated by how I didnt need to schedule an appointment. Instead, I could perform these treatments in the comfort of my home. Here are a few key points I discovered:
- Sessions: IPL requires multiple sessions because hair grows in cycles. Not all hair follicles are targeted in one go. Persistence is key.
- Maintenance: Even after achieving desired results, occasional maintenance sessions are necessary. I learned the hard way when I skipped a few and noticed some regrowth.
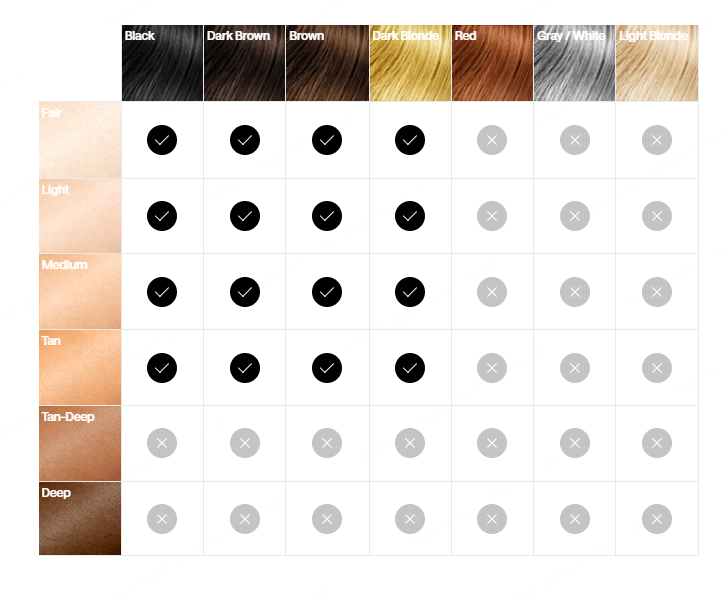
- Skin Type Compatibility: IPL works best on light to medium skin tones with dark hair. The contrast ensures the light targets hair pigment effectively. For someone with a darker complexion like myself, its crucial to use a device thats safe for darker skin tones.
Using the device for the first time was nerve-wracking, but as I got more comfortable, it became a part of my routine. The promise of smooth, hair-free skin was a huge motivator.
Choosing My Arsenal: Reviewing Popular At-Home Laser Hair Removal Devices
I was on a mission to find the perfect at-home laser hair removal device. The options were endless, and I quickly realized that picking the right one wasn't going to be a walk in the park. Instead of getting overwhelmed, I decided to dive deep and get my facts straight.
My Criteria
- Effectiveness: I wanted a device that actually works. No point in spending time and money if it doesnt deliver results.
- Safety: Safety is a big concern. There has to be enough information to assure me that I'm not going to hurt myself.
- Ease of Use: I needed something user-friendly. If it requires a PhD to operate, it's not for me.
- Price: Budget matters. I was looking for options that give the best bang for my buck.
The Contenders
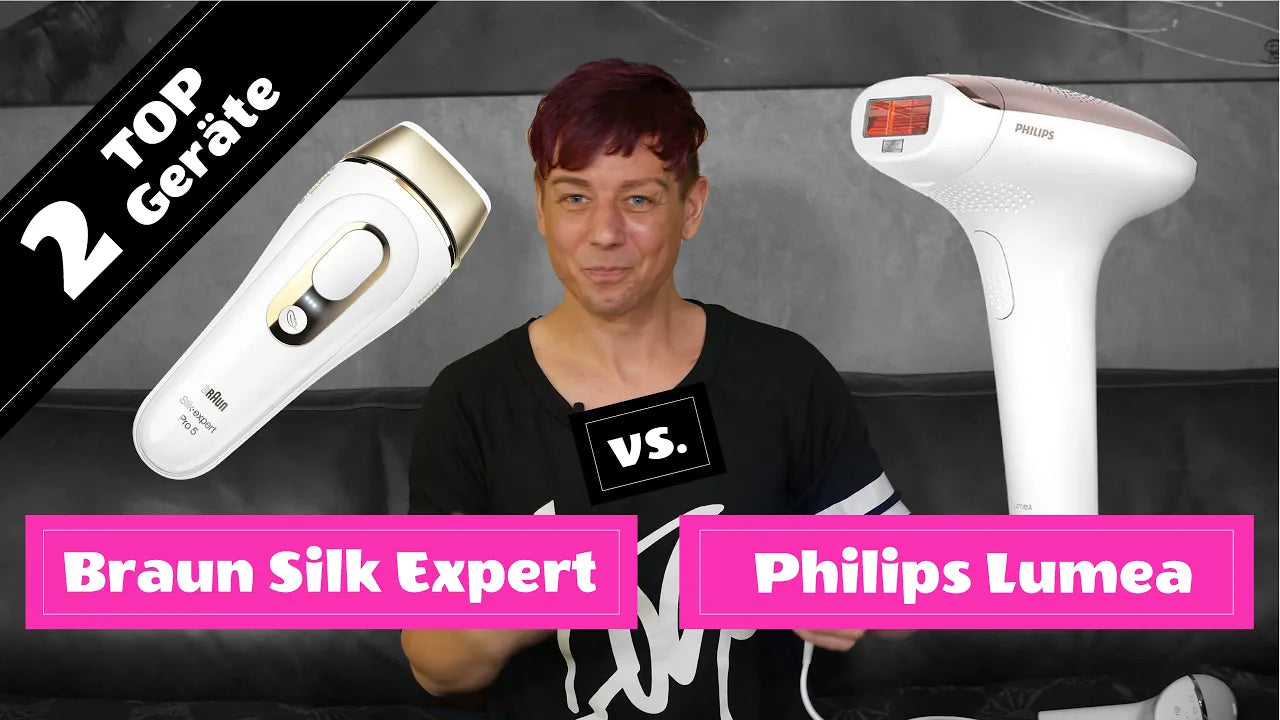
1. Philips Lumea Prestige
Philips Lumea Prestige seemed to be the superstar in this category. Built-in skin tone sensors and a variety of attachments for different body areas made it quite appealing.
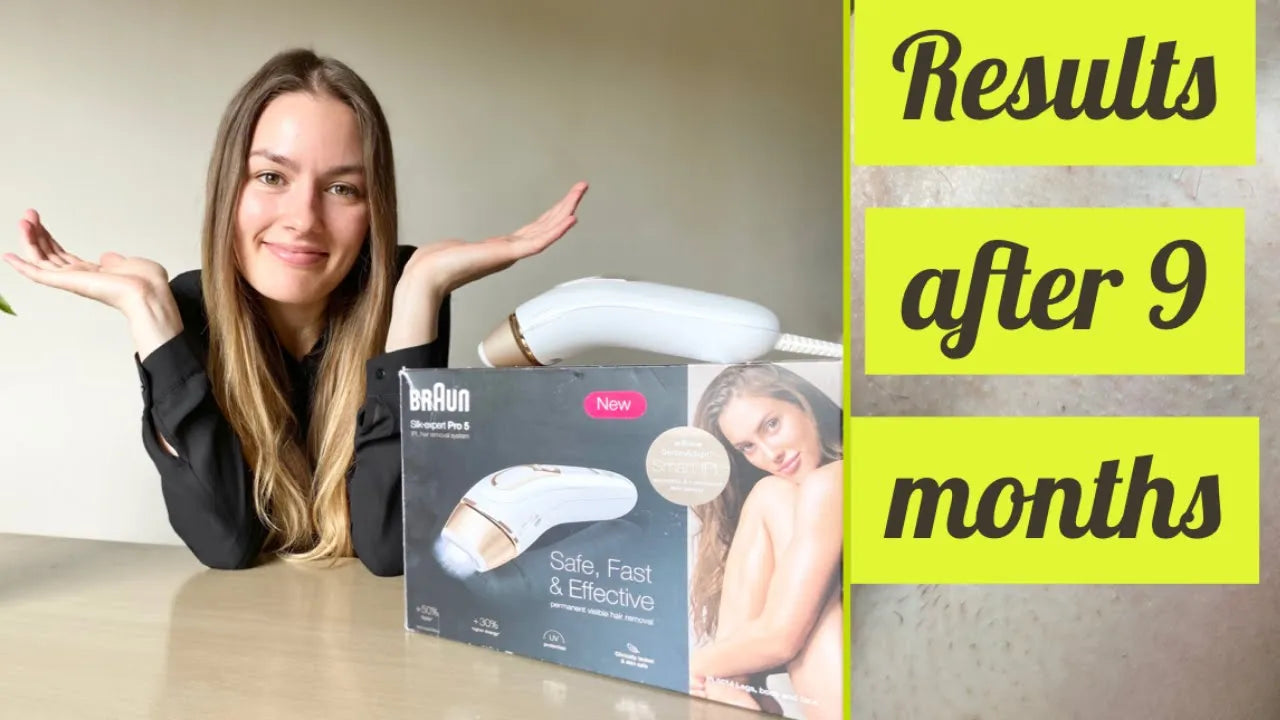
2. Braun Silk-Expert Pro 5
Braun Silk-Expert Pro 5 came up next. What really caught my eye was its SensoAdapt technology that continuously reads skin tone and adapts the flash intensity. It sounds like a game-changer.
3. Tria Hair Removal Laser 4X
The Tria Hair Removal Laser 4X, with its dermatologist-tested label, was another strong contender. FDA-approved and offering real laser technology, it promised a professional-grade experience at home.
My Testing Experience
Testing these devices was like a science experiment. I lined them all up, read the manuals meticulously, and braced myself.
- Philips Lumea Prestige: I found it easy to use, with intuitive settings and straightforward steps. The results started showing after a few sessions. The downside? It was on the pricier side.
- Braun Silk-Expert Pro 5: I appreciated the automatic skin tone sensors. It was fast and seemed efficient. However, I wondered if the intensity was enough for coarser hair.
- Tria Hair Removal Laser 4X: This one had a bit of a learning curve. The laser zaps felt more intense, but the results seemed promising. It required patience, though.
Final Thoughts
Each device had its own pros and cons, making it clear that the choice largely depends on individual needs and preferences. I'll spill all the beans in the sections that follow!
The First Encounter: Setting Up and Using My Device
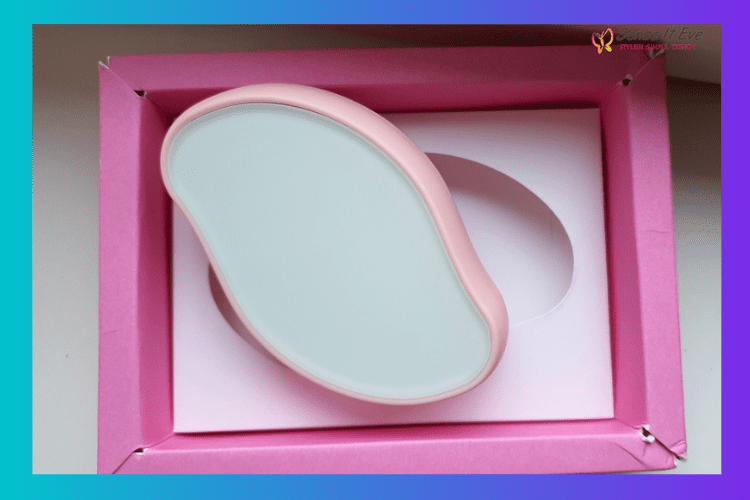
I remember the day my at-home laser hair removal device arrived like it was yesterday. The sleek box held so much promise, and I couldnt wait to unveil its magic. The device was a beautiful, modern piece of technology. It felt powerful just holding it. But before I could start zapping away unwanted hair, there were some crucial steps to follow.
Unboxing and Setting Up
The unboxing process was almost ceremonial. Inside the box, I found:
- The IPL device itself
- A power adapter
- A pair of safety glasses
- An instruction manual
I carefully read through the manual, absorbing every detail. Safety was a high priority, and I didnt want to risk any mishaps. Below is the setup process I followed:
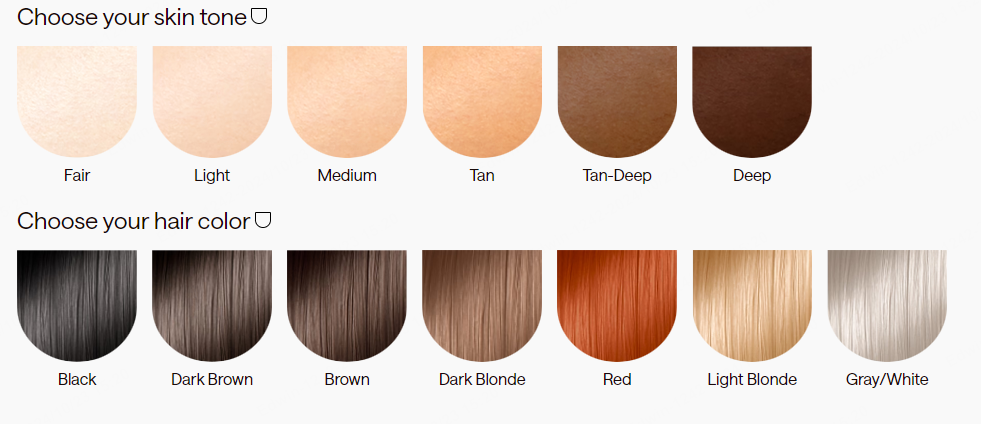
- Checked the Skin Tone Chart: The device came with a guide to check if my skin tone was suitable for IPL treatment. Lucky for me, I was within the safe spectrum.
- Plugged In the Device: With a quick glance at the power adapter, I connected the device to the outlet. It hummed softly, a sound that promised many hair-free days ahead.
- Safety First: I slid on the safety glasses. They made me feel like a scientist about to embark on a groundbreaking experiment.
Using the Device
With the setup complete, it was time for action. Heres how I used the device for the first time:
-
Test Patch: Following the manuals recommendation, I performed a test patch on a small area of my arm. I waited 24 hours to ensure there was no adverse reaction. Thankfully, my skin stayed calm.
-
Selecting the Intensity Level: The device had multiple intensity settings. I started at the lowest level to see how my skin would react. It felt like a gentle warm snap, not at all uncomfortable.
-
Application: Heres a step-by-step look at the application process:
- I shaved the area to be treated, ensuring no hair was above the skin.
- Positioned the device at a 90-degree angle to my skin.
- Pressed the flash button, moving the device to the next spot after each flash.
The entire process was straightforward and surprisingly quick. Each flash was like a tiny promise of smoother skin. I felt a mixture of excitement and curiosity about the results to come.
Next week, its time for the second session. How effective will it be? Only time will tell.
Chapter One: Week 1 Initial Impressions and Experiences
I open the box of my new at-home laser hair removal device with a mix of excitement and caution. I go through the packaging, noting the sleek design and the hefty manual that seems to promise answers to all my unasked questions. The user manual becomes my evening read as I unravel the steps and precautions involved.
Day one starts with anticipation and a bit of anxiety. Here are my initial steps:
-
Patch Test
- I begin with a patch test on a small part of my leg. The manual warns this is crucial to avoid any adverse reactions.
- The sensation is a bit like a mild elastic band snap. Not too painful, but certainly noticeable.
-
Setting Adjustments
- Based on my skin tone and hair color, I set the device to a medium level. The device is smart, offering auto-adjustments, but I prefer manual to start slow.
-
First Full Application
- I proceed to treat my whole leg. The process takes about 20 minutes, and I find the rhythm of targeting one spot, waiting for the flash, then moving to the next.
- My skin feels a mild warmth, but nothing uncomfortable.
By the end of the first session, I am optimistic. It's straightforward, but I keep reminding myself to be patient, as results are not instant. The next day, theres no irritation or redness, just a faint warmth lingering on my skin.
Throughout the week, I follow the instructions carefully. Here are my experiences:
-
Considerable Time Investment
- Each session takes about 20-30 minutes per leg. Initially, it feels like a long time, but as I get into it, I find it almost meditative.
-
Sensation and Comfort
- The discomfort level stays low. Occasionally, on sensitive areas, I feel a more noticeable pinch, but overall it's manageable.
-
Daily Observation
- I diligently observe my skin for any changes. A slight dryness appears, but regular moisturizing remedies it.
The initial week with my at-home laser hair removal device ends on a positive note. No dramatic changes yet, but my skin remains calm and receptive, building my confidence for the weeks to come.
Chapter Two: Week 4 Visible Changes and Adjustments
By the time week four rolled around, I couldnt help but keep glancing at my legs in disbelief. Was this really working, or was it just my imagination? If you remember, I was a bit skeptical at first. In the moisturizing light of my bathroom, I decided to take a closer look. It seemed like fewer hairs were sprouting, and the ones that did show up were finer and lighter. Could it be?
Notable Observations:
-
Hair Reduction: By now, I noticed:
- My leg hair had become noticeably thinner.
- The growth rate had slowed down significantly.
-
Skin Condition:
- I didnt notice any redness or irritation.
- My skin felt smooth, almost as if exfoliated, where I had used the device.
Initially, I was apprehensive about side effects. To mitigate risks, I had:
- Started with the lowest intensity setting.
- Followed up each session with a gentle moisturizer.
Adapting to Routine
Using the device every week became second nature. It takes only about 15 minutes to cover the legs. But let me tell you, the first time I turned up the intensity, I was nervous. I remember flinching a bit, feeling a slight zap, a bit more noticeable but still bearable.
Practical Adjustments
To keep up with comfort and effectiveness:
- Timing: I scheduled sessions in the evening. This gave any potential redness time to subside overnight.
- Prepping the Skin: I made it a habit to exfoliate a day prior. This seemed to make a difference in how well the laser caught the hairs.
There were days when I considered skipping a session, especially after a long day at work. Yet, the thought of smoother legs by summer kept me going.
A Shared Experience
One evening, my friend, Sarah, popped by. We started chatting about the device.
"Do you really think its worth it?" she asked, examining her own arm. I smiled, "Look at this," I responded, running my hand over my shin. She raised an eyebrow. "Might be time to get one for yourself."
Week four was a turning point. Seeing those visible changes kept me motivated. Armed with refined techniques and stories to share, I eagerly awaited the transition into the next phase.
Chapter Three: Month 3 Evaluating Long-term Results and Side Effects
By the time I reached month three of using the at-home laser hair removal device, I was both excited and anxious to analyze the long-term results and potential side effects of the treatment. I'd spent weeks adhering to a bi-weekly schedule, meticulously following the manufacturers instructions.
Here's what I noticed as month three progressed:
-
Hair Regrowth:
- Initially, there was a marked reduction in hair regrowth. Areas such as my legs and underarms showed a significant decrease in hair density.
- Some areas, however, still had stubborn patches of hair. My chin, in particular, seemed resistant, regrowing hair albeit finer and sparser.
-
Skin Texture and Health:
- My skin felt smoother and visibly clearer. The reduction in ingrown hairs was a major bonus.
- I did notice occasional redness immediately post-treatment, but using aloe vera gel calmed it swiftly.
-
Side Effects:
- Minor Burns: Once, I noticed a small burn mark after treating my upper lip. It healed in a few days, but I became extra cautious with the intensity setting afterward.
- Pigmentation Changes: I experienced slight hyperpigmentation around my bikini area. This worried me initially, but it gradually faded away.
-
Device Convenience:
- The convenience factor remained a strong positive. I loved not having to book salon appointments and could comfortably conduct treatments at home.
- Sessions became quicker as I grew familiar with the devices usage.
-
Cost-Benefit Analysis:
- Given the upfront investment, the results were promising and potentially more cost-effective than repetitive salon treatments in the long run.
- The slight discomfort or side effects felt minor compared to the advantages I was experiencing.
As the third month concluded, I felt like a seasoned pro with my at-home device. The journey wasn't without its hiccups, but it was enlightening. Observing the tangible reduction in hair growth and increasing intervals of hair-free smoothness assured me of the devices efficacy.
Overall, by recording my experiences, I could map out patterns and trends. Keeping a journal with dates and observations became instrumental in understanding the full scope of the treatments effectiveness.
The Science Behind the Magic: Exploring How IPL Technology Affects Different Skin and Hair Types
I remember my first encounter with IPL (Intense Pulsed Light) technology. The initial excitement was palpable, but I soon realized the science behind it was even more fascinating. IPL devices emit a broad spectrum of light that targets melanin in hair follicles. This light is absorbed and converted into heat, which essentially destroys the follicle, inhibiting future hair growth.
One of the most intriguing aspects of IPL technology is how it interacts with various skin and hair types. Here's a breakdown of what I learned:
Skin Types
-
Fair Skin:
- IPL tends to work effectively on lighter skin tones because there's a stark contrast between the melanin in the skin and the hair.
- Less melanin in the skin means less risk of burns or pigmentation changes.
-
Medium Skin:
- Results are generally good, but there's a need to be cautious about the settings used.
- Devices with adjustable light intensity are ideal for people with medium skin tones.
-
Dark Skin:
- Higher melanin levels can make IPL treatment more challenging.
- Important to use IPL devices specifically designed for darker skin to avoid burns and hyperpigmentation.
Hair Types
-
Dark Hair:
- Best candidate for IPL treatment due to high melanin levels in the hair.
- The light is more efficiently absorbed, leading to better results.
-
Light Hair:
- Includes blonde, red, and gray hair.
- Challenging for IPL as there's less melanin to absorb the light.
- Some advanced devices claim effectiveness on lighter hair but results may vary.
The Role of Spot Size and Pulse Duration
I discovered that the size of the device's treatment window (spot size) and the duration of light pulses also play a crucial role. Larger spot sizes can cover bigger areas more quickly but might be less precise. Longer pulse durations can be safer for darker skin but may require more sessions for effective hair removal.
I also learned that cooling mechanisms are essential, primarily to protect the skin. Many IPL devices have built-in cooling systems to make treatments more comfortable and reduce the risk of side effects, like redness or swelling.
Understanding these nuances helped me make an informed decision about which at-home IPL device to try. Its a blend of science and personalized care, a fascinating journey toward smoother skin.
Safety First: Precautions and Best Practices for Effective and Safe Use
When I decided to embark on the journey of at-home laser hair removal, I knew safety had to come first. My initial step was to read the user manual meticulously. Every device has specific guidelines and, ignoring them, can lead to adverse effects. I learned quickly to always start with a patch test. Here are my go-to tips and practices that helped me ensure a safe and effective experience:
Before Treatment
- Patch Test: Always perform a patch test on a small area of your skin. This helps check for any adverse reactions.
- Skin Cleanliness: Make sure the skin is clean, dry, and free from any lotions, oils, or perfumes.
- Shaving: Shave the area to be treated. This maximizes the devices efficiency and minimizes the risk of burns.
- Avoid Sun Exposure: Stay out of the sun a few days before treatment. Sunburned or tanned skin can lead to complications.
During Treatment
- Eye Protection: Some devices emit bright flashes. Always use the protective eyewear provided.
- Skin Tone Sensor: Use devices with a built-in skin tone sensor that adjusts the light intensity according to your skin type.
- Responsiveness: Be attentive to how your skin feels. If you feel any discomfort or burning, stop immediately.
After Treatment
- Cooling Down: After a session, I usually apply a soothing aloe vera gel. It helps in cooling down the skin.
- Avoid Sunlight: Avoid direct sun exposure for at least 24-48 hours. If I have to go out, I use a broad-spectrum SPF 30 or higher.
- Moisturizing: Keeping the treated area moisturized can aid in the healing process and prevent dryness.
General Tips
- Consistent Schedule: Stick to the treatment schedule as recommended in the manual.
- Device Maintenance: Regularly clean the device to ensure its longevity and effectiveness.
Reminder: Never use laser hair removal devices on tattoos, moles, or near the eyes.
By adhering to these precautions and best practices, I found my at-home laser hair removal experience to be not only safe but incredibly effective as well.
Expert Opinions: Consultations with Dermatologists On At-Home Laser Treatments
When I had the idea to explore the effectiveness of at-home laser hair removal, I knew I had to consult with dermatologists. Armed with my trusty notebook and a list of burning questions, I visited some experts.
First on my list was Dr. Lisa Wong, a board-certified dermatologist with a knack for explaining complex topics in simple terms. Her clinic smelled like lavender, instantly calming my nerves. Dr. Wong emphasized, "At-home laser treatments can be effective, but they're not a one-size-fits-all solution." She explained how skin color and hair thickness are crucial factors in the effectiveness of these devices. Dr. Wong also noted that while at-home devices use IPL (Intense Pulsed Light), professional treatments often use a different laser technology, which might be more effective for certain skin and hair types.
Next, I met Dr. Raj Patel, whose clinic walls were adorned with certificates and awards. Dr. Patel was quick to highlight the safety risks. "Burns, scarring, and pigmentation issues can occur if these devices are not used properly," he warned. As someone who had once impatiently used a straightening iron incorrectly and suffered minor burns, his cautionary words resonated deeply.
Dr. Patel also discussed the importance of patch tests. "Always do a patch test before using the device on a larger area. Sensitivity or allergic reaction on a small patch of skin can save you from a lot of pain and disappointment later."
My final consultation was with Dr. Elizabeth Hart, a dermatologist known for her research in laser technology. Dr. Hart reminded me, "Patience is key. You won't see results after just one or two sessions. Consistency over a few months is where the magic happens." I appreciated her straightforwardness, as I tend to lose motivation if results arent immediate.
Here are some key takeaways from my consultations:
- Understanding Your Skin Type: It's crucial to know if your skin type is suitable for IPL at-home treatments.
- Safety Measures: Always read the manual and follow instructions to avoid burns or pigmentation issues.
- Patch Tests: Never skip a patch test to ensure there are no adverse reactions.
- Consistency: To see effective results, consistent use over several months is necessary.
Armed with these expert insights, I felt more prepared to dive into the world of at-home laser hair removal treatments.
Weighing Costs: Is At-Home IPL More Economical Than Professional Treatments?
When I first considered at-home IPL treatments, the cost comparison to professional services stood front and center. Early in my hair removal journey, I shelled out hundreds on professional laser treatments. Each visit to the clinic seemed to drain my wallet, leaving me to wonder: is there a more cost-effective solution out there?
Initial Investment
At-home IPL devices range anywhere from $200 to $600. On the surface, thats a substantial outlay. I remember hesitating before purchasing my device, thinking, "Is this truly worth it?" Compared to professional treatments, though, which can easily rack up $100 to $300 per session, I started to see at-home IPL as an appealing option.
Long-Term Savings
I broke down the costs over a year, considering that a full course of professional treatment can require 6-8 sessions for optimal results:
- Professional Treatments:
- $200 per session
- 6 sessions minimum = $1,200
- At-Home IPL:
- One-time purchase of $300
- Unlimited use
When I did the math, the savings were evident. Opting for an at-home device could save me almost $1,000 in a single year, not to mention the indefinite future use.
Other Cost Factors
But it's not just the raw numbers. There are several other factors where at-home IPL devices stand out:
-
Convenience:
- No traveling to clinics.
- Flexible scheduling from the comfort of home.
-
Time Savings:
- Each session at home took less than 30 minutes.
- No waiting rooms or appointment delays.
-
Comfort:
- Familiar environment versus potentially uncomfortable clinic settings.
My Experience
I started to weigh my experiences and the hidden costs I hadn't initially considered. That evening traffic to the clinic? Time is money, after all. The occasional parking fees? They added up. And lets not forget the small discomfort of having a stranger perform the treatments - awkward much?
The cherry on top was knowing I could perform touch-ups anytime I wanted. This aspect alone gave me peace of mind, making the at-home device not just economical but also stress-free.
Final Thoughts
Comparing the expenses involved, along with the hidden perks, it became clear that the initial investment in an at-home IPL device pays for itself many times over. For me, the economics didnt just balance out; they tipped the scale heavily in favor of at-home IPL.
Success Stories and Slips: Anecdotes from Fellow Users
When I first decided to try at-home laser hair removal, I had no idea what to expect. The online reviews were a mixed bag, creating both hope and anxiety. I reached out to friends and family, hoping to gather some first-hand stories. What I got was a fascinating mix of success stories and cautionary tales that I think youll find both informative and entertaining.
Success #1: The Glowing Testimonial
"I've been using the device for six months now, and I can finally wear shorts without feeling self-conscious. The ease of doing it at home is unbeatable. I never thought Id get results this good!"
When I read this, it boosted my confidence. I couldnt wait to see if Id have a similar experience.
Slip #1: The Overzealous Enthusiast
My cousin John was excited to get started but didnt read the instructions thoroughly. He ended up using it on a higher setting than recommended and got minor burns.
- Lesson Learned: Always read the manual.
- Johns Tip: Start slow and test on a small patch of skin.
Success #2: The Busy Moms Blessing
"Juggling kids and work left me no time for salon visits. At-home IPL has been a lifesaver. My legs and underarms are almost hair-free after just a few months!"
This anecdote made me think this could work around my hectic schedule.
Slip #2: The Inconsistent User
My friend Lisa got her device but wasnt consistent. She missed sessions and didnt see much progress.
- Lesson Learned: Consistency is key.
- Lisas Tip: Set reminders.
Success #3: The Skeptic Turned Believer
"I was doubtful at first, but after seeing the long-term results, Im a convert. Im saving so much time and money compared to salon visits!"
I loved hearing this because it sounded like the ultimate goal: efficiency and cost-effectiveness.
Slip #3: The Impatient One
Another friend, Karen, wanted instant results. She was disappointed when her hair didnt vanish overnight.
- Lesson Learned: Patience is vital.
- Karens Tip: Understand its a process.
These stories reflect the spectrum of experiences, and each one taught me something valuable.
Final Verdict: Is At-Home Laser Hair Removal Worth the Investment?
Sitting on my bathroom floor, clutching the sleek, futuristic device like it's some holy grail, I couldn't help but wonder, "Is this really worth it?" After weeks of diligently zapping away, I started to notice some things that gave me pause and hope in equal measure.
Let's rewind a bit. The idea of never shaving again had me more excited than I'd like to admit. I envisioned a world where I could lounge by the pool, carefree, without any razor burns or last-minute panic. But, as with all things too good to be true, there were ups and downs.
The Promise of Convenience
Pros:
- Time-Saving: No more last-minute runs to the salon, which was becoming a hassle with my hectic schedule.
- Privacy: It's a bit awkward having a stranger laser your bikini line; doing it myself was a game-changer.
- Cost-Effective: Initial investment aside, it definitely saved me bucks in the long run versus regular salon visits.
Cons:
- Consistency is Key: You have to be diligent. Skipping sessions can set you back weeks.
- Upfront Cost: Even the most basic models aren't cheap, and the high-end ones? Let's just say my wallet felt the pinch.
- Learning Curve: It wasn't exactly plug-and-play. Figuring out the best settings took a bit of trial and error.
The Results
I'll be honest, my expectations were sky-high. I'd seen those before-and-after pictures and thought, "Yes, sign me up!" But real life? It was a mixed bag.
- Hair Reduction: Definitely noticeable, but not as dramatic as I had imagined. Patience became my new mantra.
- Smooth Skin: No more prickly regrowth, which was a dream come true.
- Sensitive Areas: The bikini line and underarms saw the most improvement; legs, however, took their sweet time.
The Unexpected Perks
What caught me off guard were the little, unexpected perks. I realized midway that my skin texture was improving. Fewer ingrown hairs, my arch-nemesis, started to appear. It wasn't an overnight miracle, but given enough time, it felt like I was slowly winning a war I didn't know I was fighting.
Conclusion: Reflecting on the Journey to Smoother Skin
When I first saw the commercials for at-home laser hair removal devices, I was skeptical but intrigued. Could these gadgets really be as effective as professional treatments? My journey started with research and comparisons, weighing the pros and cons of different devices on the market. Some promised permanent hair reduction, while others touted convenience and affordability.
I decided to take the leap and test a few popular devices myself. The first one I tried had a sleek design, fitting comfortably in my hand. The instructions were simple, and within minutes, I was ready to zap those pesky hairs away. However, the initial sessions were more painful than I anticipated. It felt like tiny rubber bands snapping against my skin. But as I continued with bi-weekly treatments, the discomfort lessened, and I started seeing fewer and fewer hairs growing back.
A few months in, I noticed significant differences between the devices. Some offered multiple power settings, others had skin tone sensors to adjust the intensity. A couple of them even came with attachments for different body areas. Heres what I observed:
- The IPL device with skin tone sensors adjusted automatically, providing a safer experience for my sensitive skin.
- The laser-specific device seemed more powerful, reducing hair growth more effectively, but it was also pricier.
- A multi-functional device that included both laser and IPL options gave me versatility but was bulkier and harder to maneuver.
One surprise was the learning curve. I initially missed spots and had inconsistent results until I got the hang of it. Patience became a virtue as I realized this isn't an overnight miracle.
Months into the routine, the hair on my legs and underarms had reduced noticeably. Smooth skin was no longer a distant dream. My journey taught me that while at-home laser hair removal might not entirely replace professional treatments, it offers a convenient and effective alternative for those willing to invest time and effort.
