Posted by Mindy Lvoff
Purpose: Create bar-friendly, next generation loggerhead to make delicious hot cocktails
Techniques Used: Hot Pokering, Beverage-ignition
Equipment Used: One homemade Red Hot Poker. Optional Equipment: heat-resistant/fire-retardant mitt and protective goggles.
It all started with making the perfect hot buttered rum. What makes Dave and Nils so creative and driven is the fact that the two of them are incredibly fussy. They’re nitpickers. Food perfectionists. Cocktail fanatics. Fat separating from alcohol in what is supposed to be a hot, welcoming beverage has the potential to ruin their afternoon. Luckily, TIC Gums makes Ticaloid 310 S, a Gum Arabic and Xanthan mix that we used to emulsify melted butter, sugar, and water, effectively creating a butter syrup that could be held and mixed with rum to order. The syrup mixed with the rum into one smooth, homogeneous mixture. As with all things Dave & Nils, though, they couldn’t stop there. The drink was good, but it needed to be delicious.
It came down to how we were heating the beverage. The traditional methods—boiling it in a pot or adding boiling water to it—heated the drink too slowly or watered it down. Instead, Dave wanted to immerse a heating element into the drink itself, thereby caramelizing the sugars in the beverage in a way that the other two methods wouldn’t.That’s where the original Red Hot Poker came in. Its colonial ancestor is the loggerhead or flip-dog, a wrought iron rod with a heavy base that was heated over an open flame until red-hot, then plunged into a cocktail to heat and froth it. Antique loggerheads are hard to come by. Instead, we purchased pointed soldering coppers with wood handles from McMaster-Carr. (Dave recommends buying these new since used ones have most likely been used on lead.) We heated the soldering copper directly over the open flame of the stove for 30 minutes, then turned the lights off. We figured that the glowing, red copper base was a good sign that it was ready to use. Dave plunged it into the hot-buttered rum mix with high hopes. Unfortunately, nothing happened. It was silent. No frothing or gurgling sounds. Dave looked down, perplexed, and gasped excitedly. “Oh man, this thing is so hot it’s instantly vaporizing the liquid around it!†No sooner had he made the discovery than the hot poker cooled enough for the liquid to reach it. It started heating and frothing the drink, spraying drops of hot liquor all over Dave who calmly said, “Ow. Ow ow. Hot. Ow. Please stop.†Dave’s pain was amusing and worth the end product—a hot, delicious cocktail. However, there were some issues with our test run.
While still delicious, there was a faint copper taste imparted to the cocktail and there were particles of blackened debris left at the bottom of the drink. Dave tried substituting the soldering copper with slugs of cast iron & 316 stainless steel. We repeated the process: heat over open flame, submerge, and taste. The iron tasted like licking supplements (not delicious) and the stainless steel wasn’t a good enough conductor—it didn’t have explosive heat. So we went back to the soldering copper and created two solutions to combat the flavor and debris issues. First, we stamped the soldering copper into a bain-marie of cold water to both shake off some of the particles that we thought might be adding to the copper flavor, and then plunged it into the hot-buttered rum mix. Second, we decanted the cocktail into a serving cup, thereby leaving what particles weren’t removed by the previous step at the bottom of the heating container. The result was less copper flavor and no debris, leaving a pretty remarkable drink. This mini-success led to another conundrum—how do we make this hot cocktail method readily available bar-side? After all, what good would this technique be if you could never use it at a bar during service?
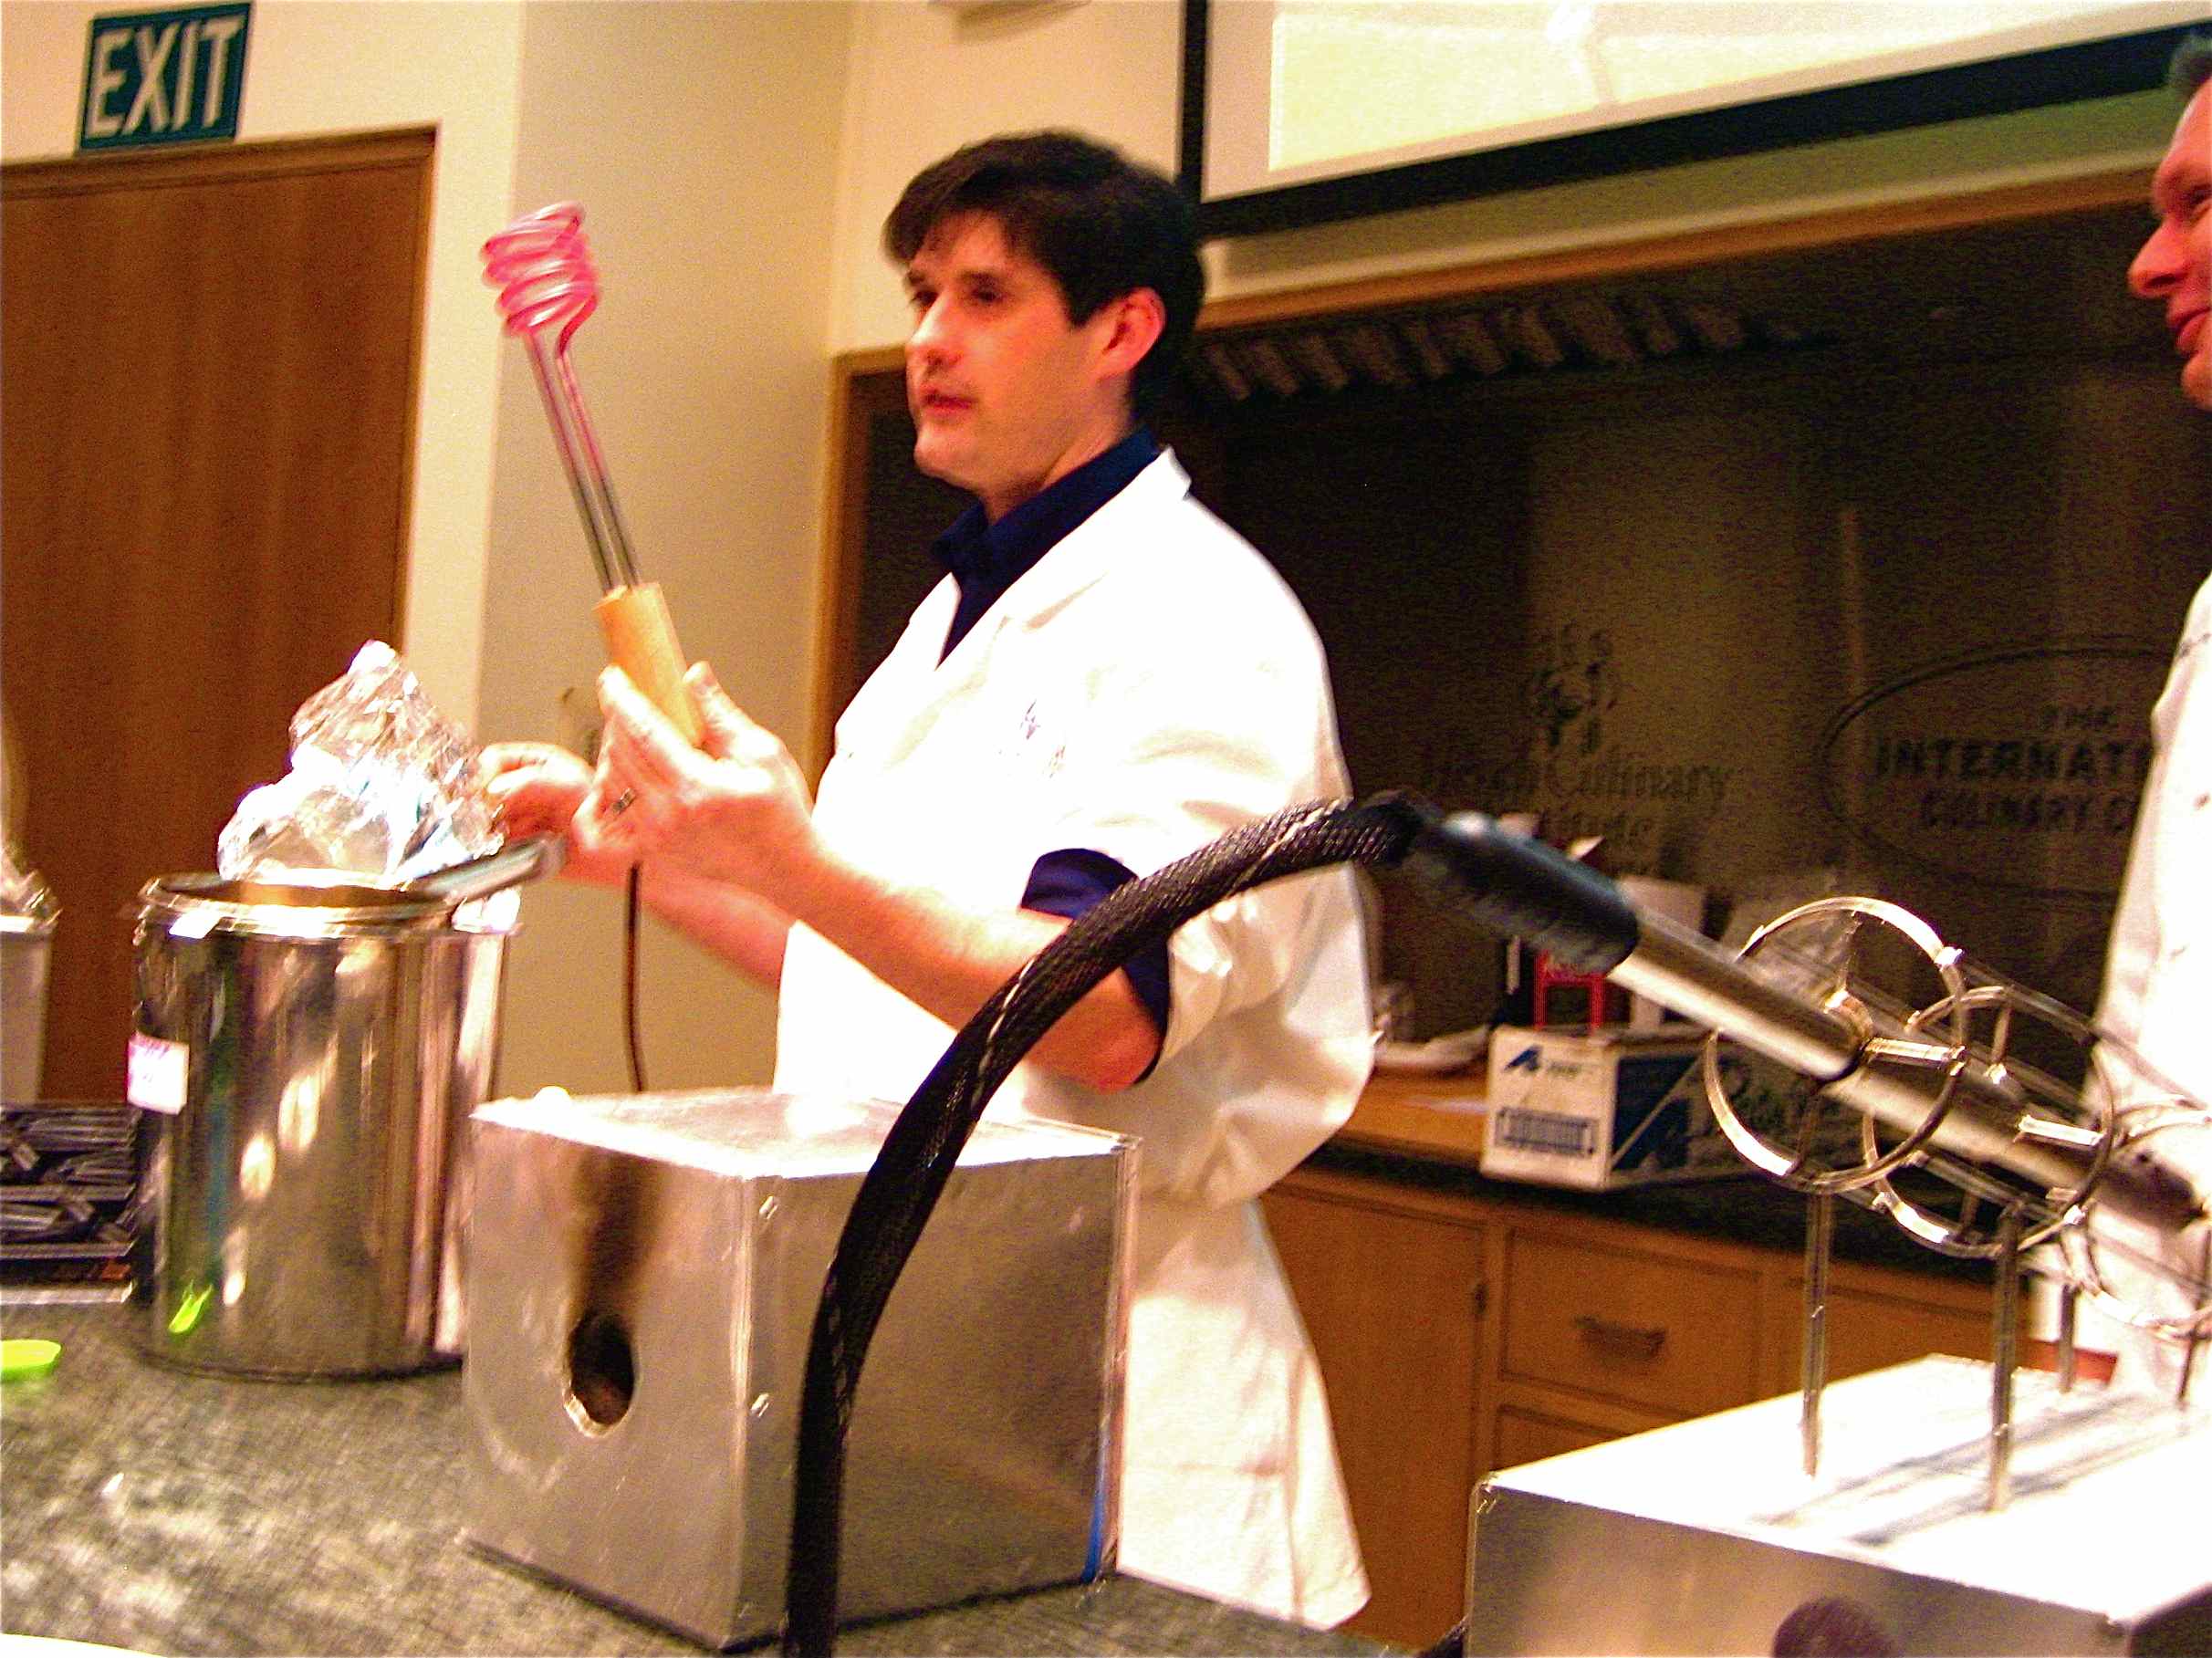
Dave toyed with another idea: heating small stones that could be dropped into a beverage, causing it to boil. He especially “liked all the potential puns you could make involving ‘rocks.’†He also enjoyed that this was the first method of boiling water that man had before the invention of pots that could sit over fire. The problem was finding stones that could withstand being heated without exploding. Dave tried “African Wonder Stone,†thinking that it might make the cut: “I put a 1 lb rock on the burner in a pastry kitchen and stepped outside to talk to someone. All of a sudden I heard this muffled pop. When I came back in, there weren’t any pieces left bigger than my fingernail… and they were everywhere.†Next up, river rocks from Crate & Barrel . This time Dave balanced a pot over them, which came in handy when these, too, exploded. His last attempt involved breaking up the lids from his Korean Dolsot bowls (made from Agalmatolite) into chunks, then placing them over the flame. They heated well and didn’t explode, but were expensive. When submerged in the cocktail, they frothed it nicely, but imparted an, albeit pleasant, mineral taste. (One of Dave’s interns recently found us small Agalmatolite stones, which is much cheaper than smashing more Dolsot bowls. We haven’t yet had a chance to put them to use.) Dave decided to return to the soldering coppers and tackle the obstacles that made them impractical for bar-side use.
Once upon a time, bars used to have open fires where they could keep loggerheads on the flame, constantly heating. Dave thought about modernizing that idea by building small kilns that could be kept behind the bar to heat soldering coppers. It would need to leak just enough energy so that it wouldn’t melt itself down, but still be hot enough to heat the copper. His first kiln did get hot—literally white-hot—and instantly incinerated a chicken heart that he threw in to test the temperature. Once he turned it off he couldn’t turn it back on because it had basically melted itself. Dave began thinking about a way to control the temperature of the kiln and had one of his “ah ha!†moments. Why build a kiln to heat a soldering copper when you can put the heating element directly into it?
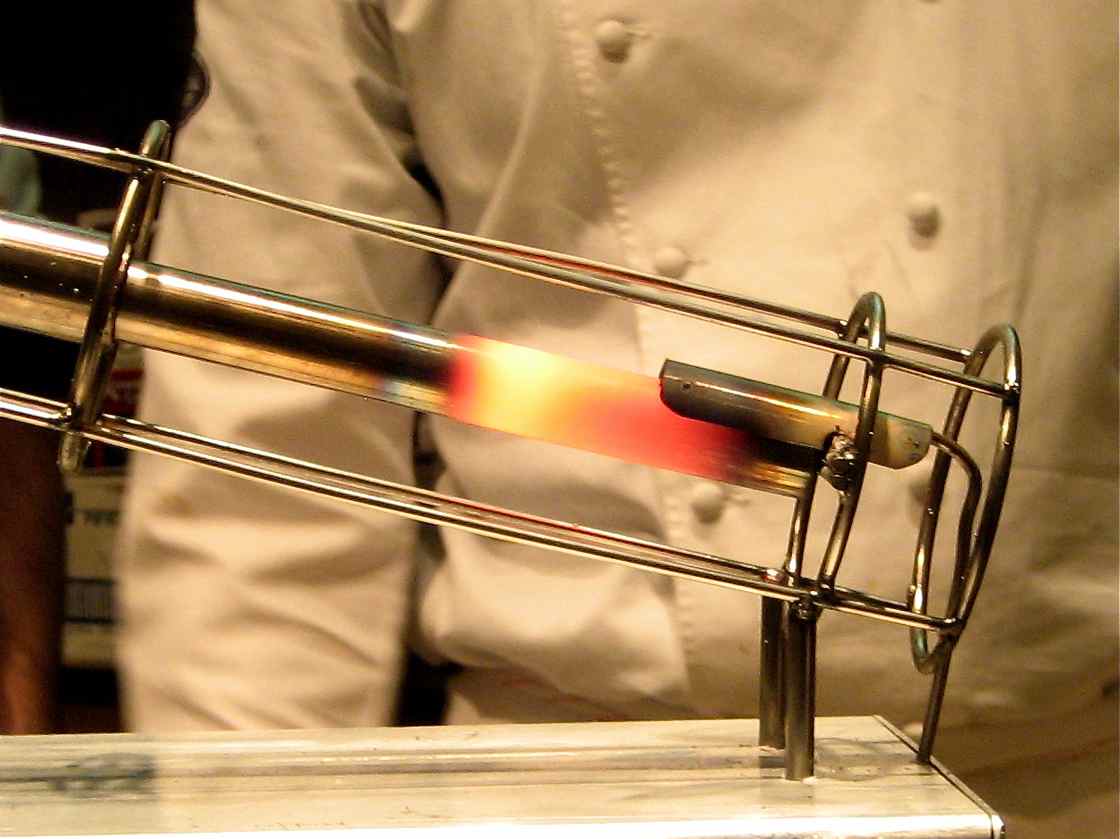
The beta version of the portable Red Hot Poker was born. It had the same wood handle as the original, but instead of a copper weight, Dave bought a bendable tubular immersion heater from McMaster-Carr that had a nichrome inner heating element inside an incoloy (nickel and steel alloy) shell, and coiled it around on itself so that it could fit in a bain marie. It looked like the lovechild of loggerhead and one of those coiled light bulbs. Instead of heating it on an open flame, you just plugged the brown electric cord coming out of its handle into the nearest wall-outlet. It did get red-hot without burning out and didn’t impart any additional flavors to the drink. It still wasn’t bar friendly, however: it looked like a demented incandescent bulb; there was no holster so you either needed to hold it for 5-10 minutes while it was heating, or rest it in something that could withstand the heat; it didn’t recover fast enough between drinks to be realistic for bar service; and the length of rod between the coiled, heating end and the handle was super short, leading to Dave burning off more knuckle hair.
Next, Dave purchased what would eventually be called “The Red Hot Poker.†It’s a Watlow Fire Rod with a 4†incoloy heated end. Unfortunately, he burnt it to death trying to see how far he could heat it. He then ordered one with an inner thermal couple to control how hot it would get, but then also subsequently broke this rod because regulating its temperature meant that it heated and cooled, hence expanded and contracted, too quickly. So he broke two of these expensive tubes right off bat (and has since gone through 10 more), but there was promise! As Dave always does in the end, he decided to make own because 1) it was cheaper and 2) he could customize it to suit his purposes. He put a 4†heating element in the end of 316 stainless steel tube, insulated it with mica tape, and put on a nice heat-resistant grip, and took the whole setup from 1200 to 800 watts. He soldered together an angled holster with a thermal couple so that the temperature would be regulated while the poker was resting in its base (1000°F), but could still get incandescently hot (well past 1700°F, which is the ignition point, but anything above 1750°F exponentially decreases the life of the poker ) when taken out. He built a large metal box to mount the holster so that it couldn’t tip over and fall, thereby injuring someone, and equipped it with a power switch and temperature display on the front.
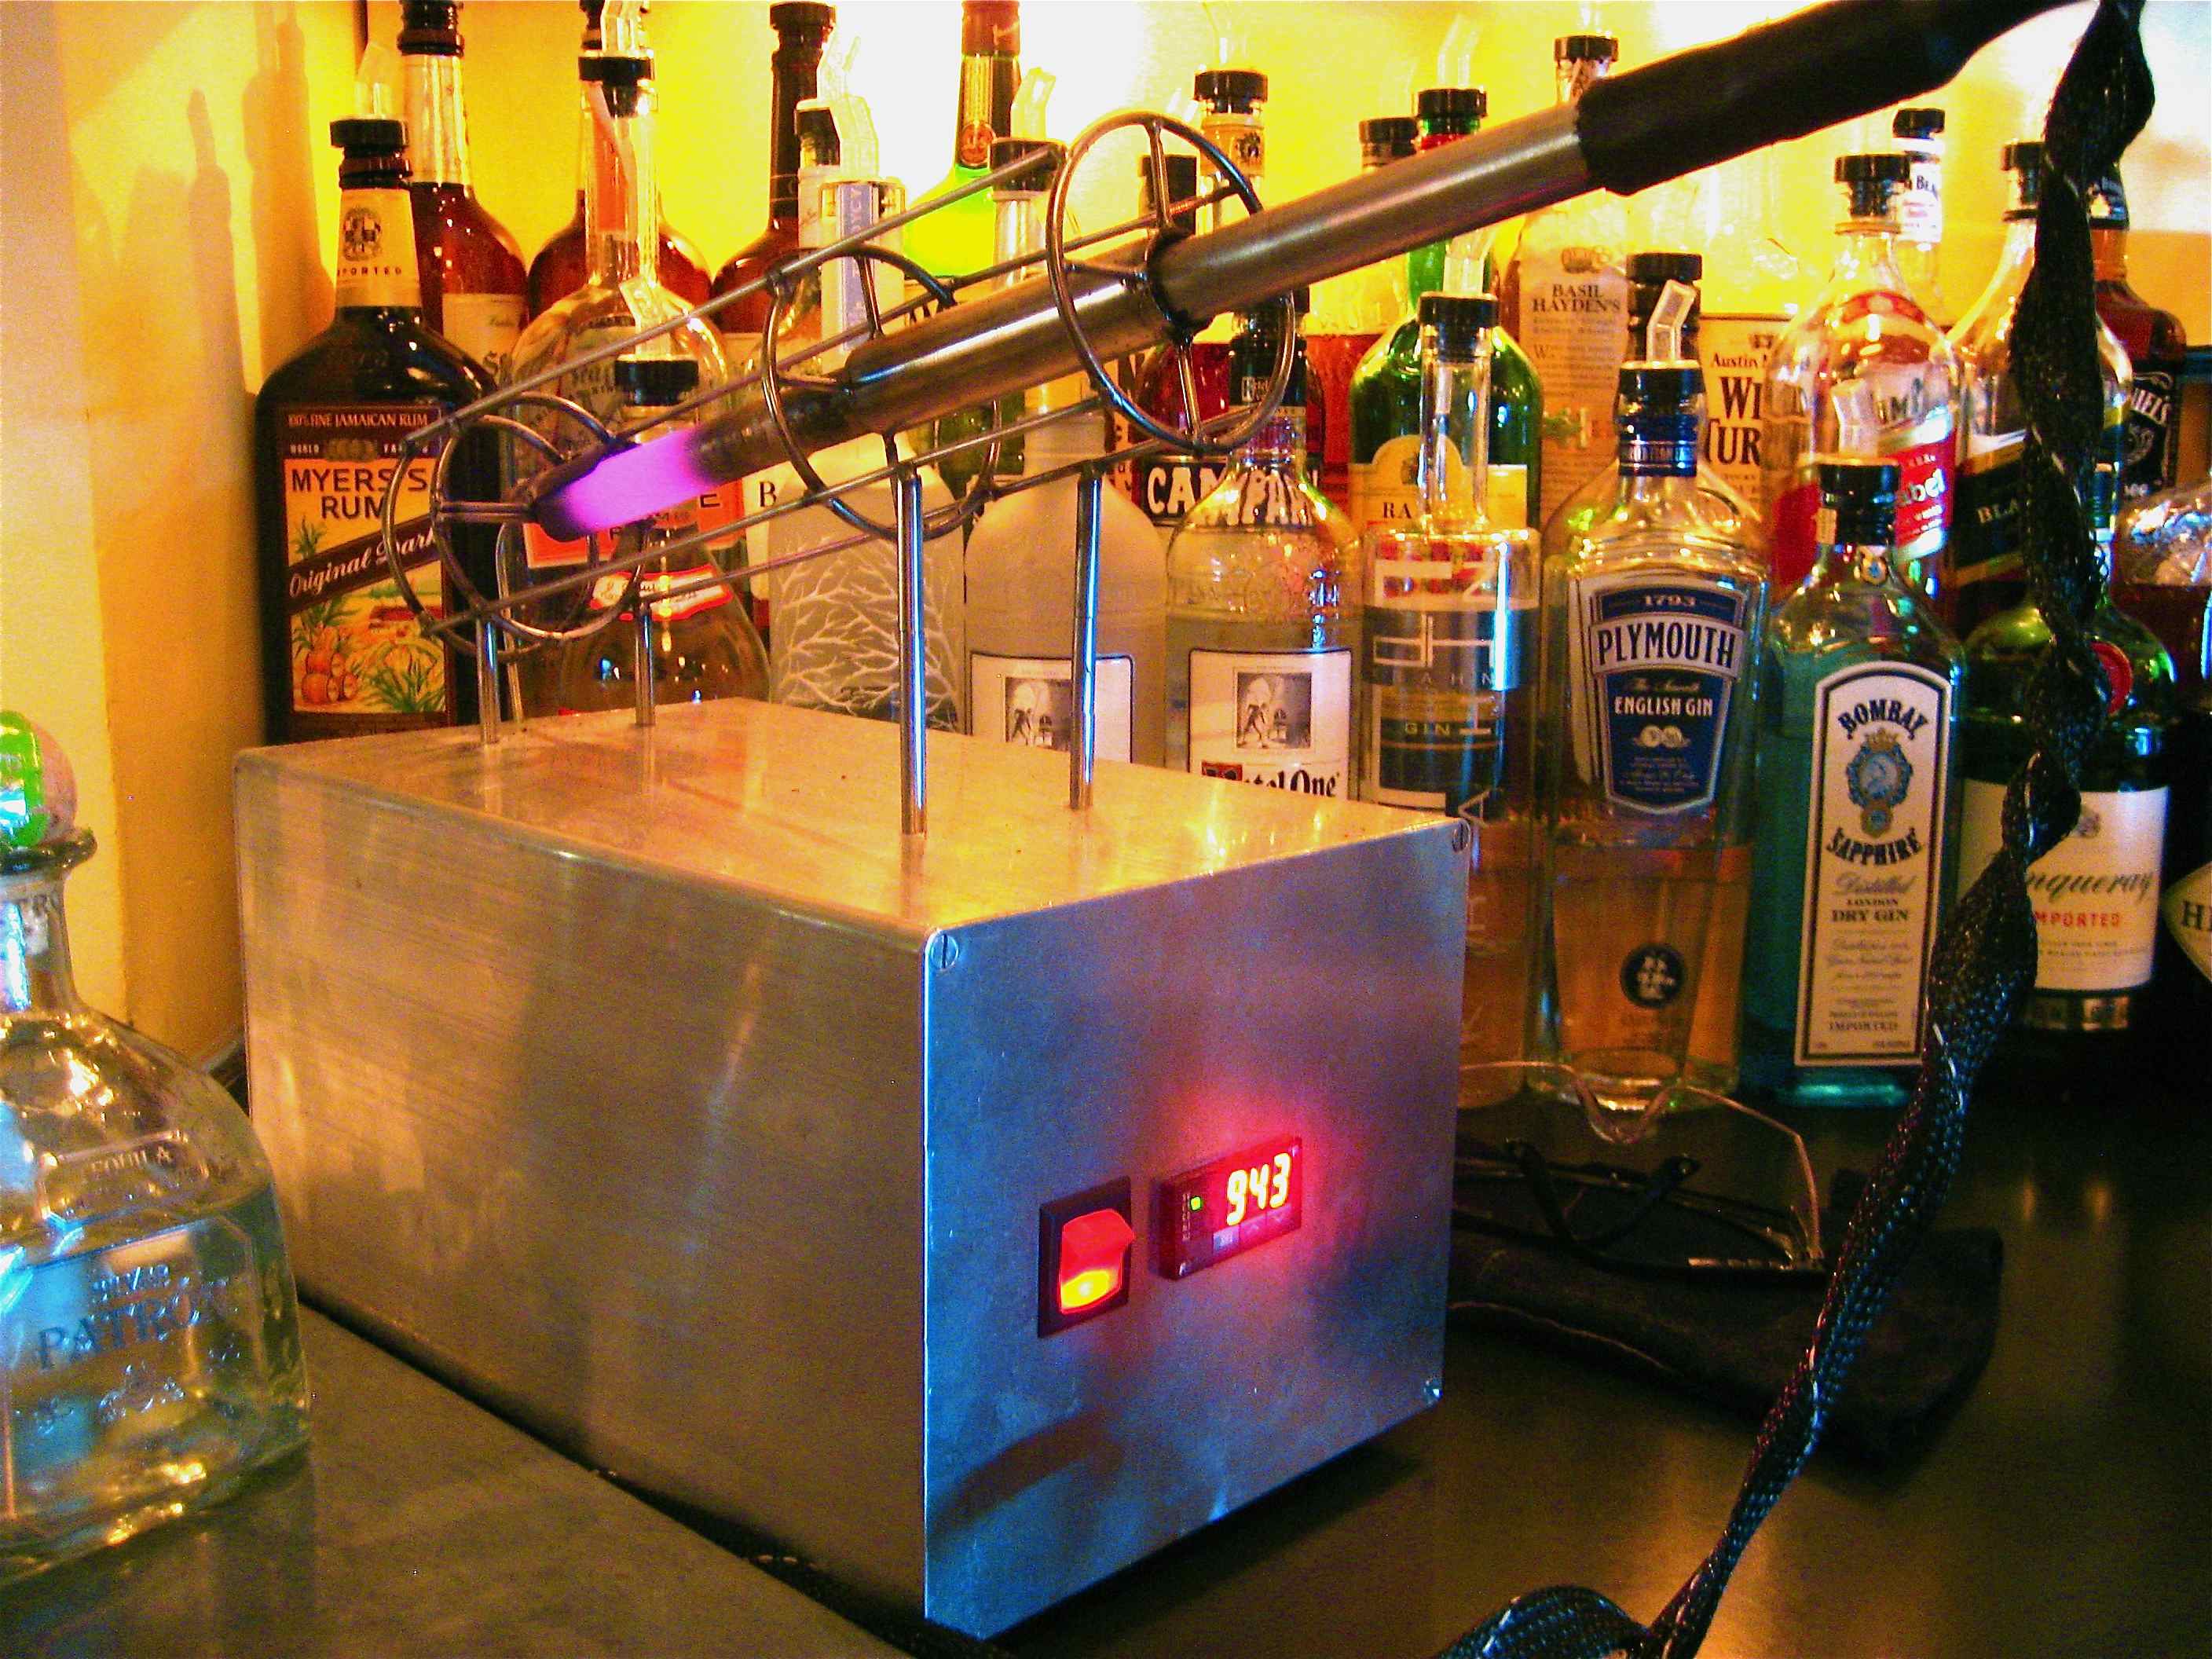
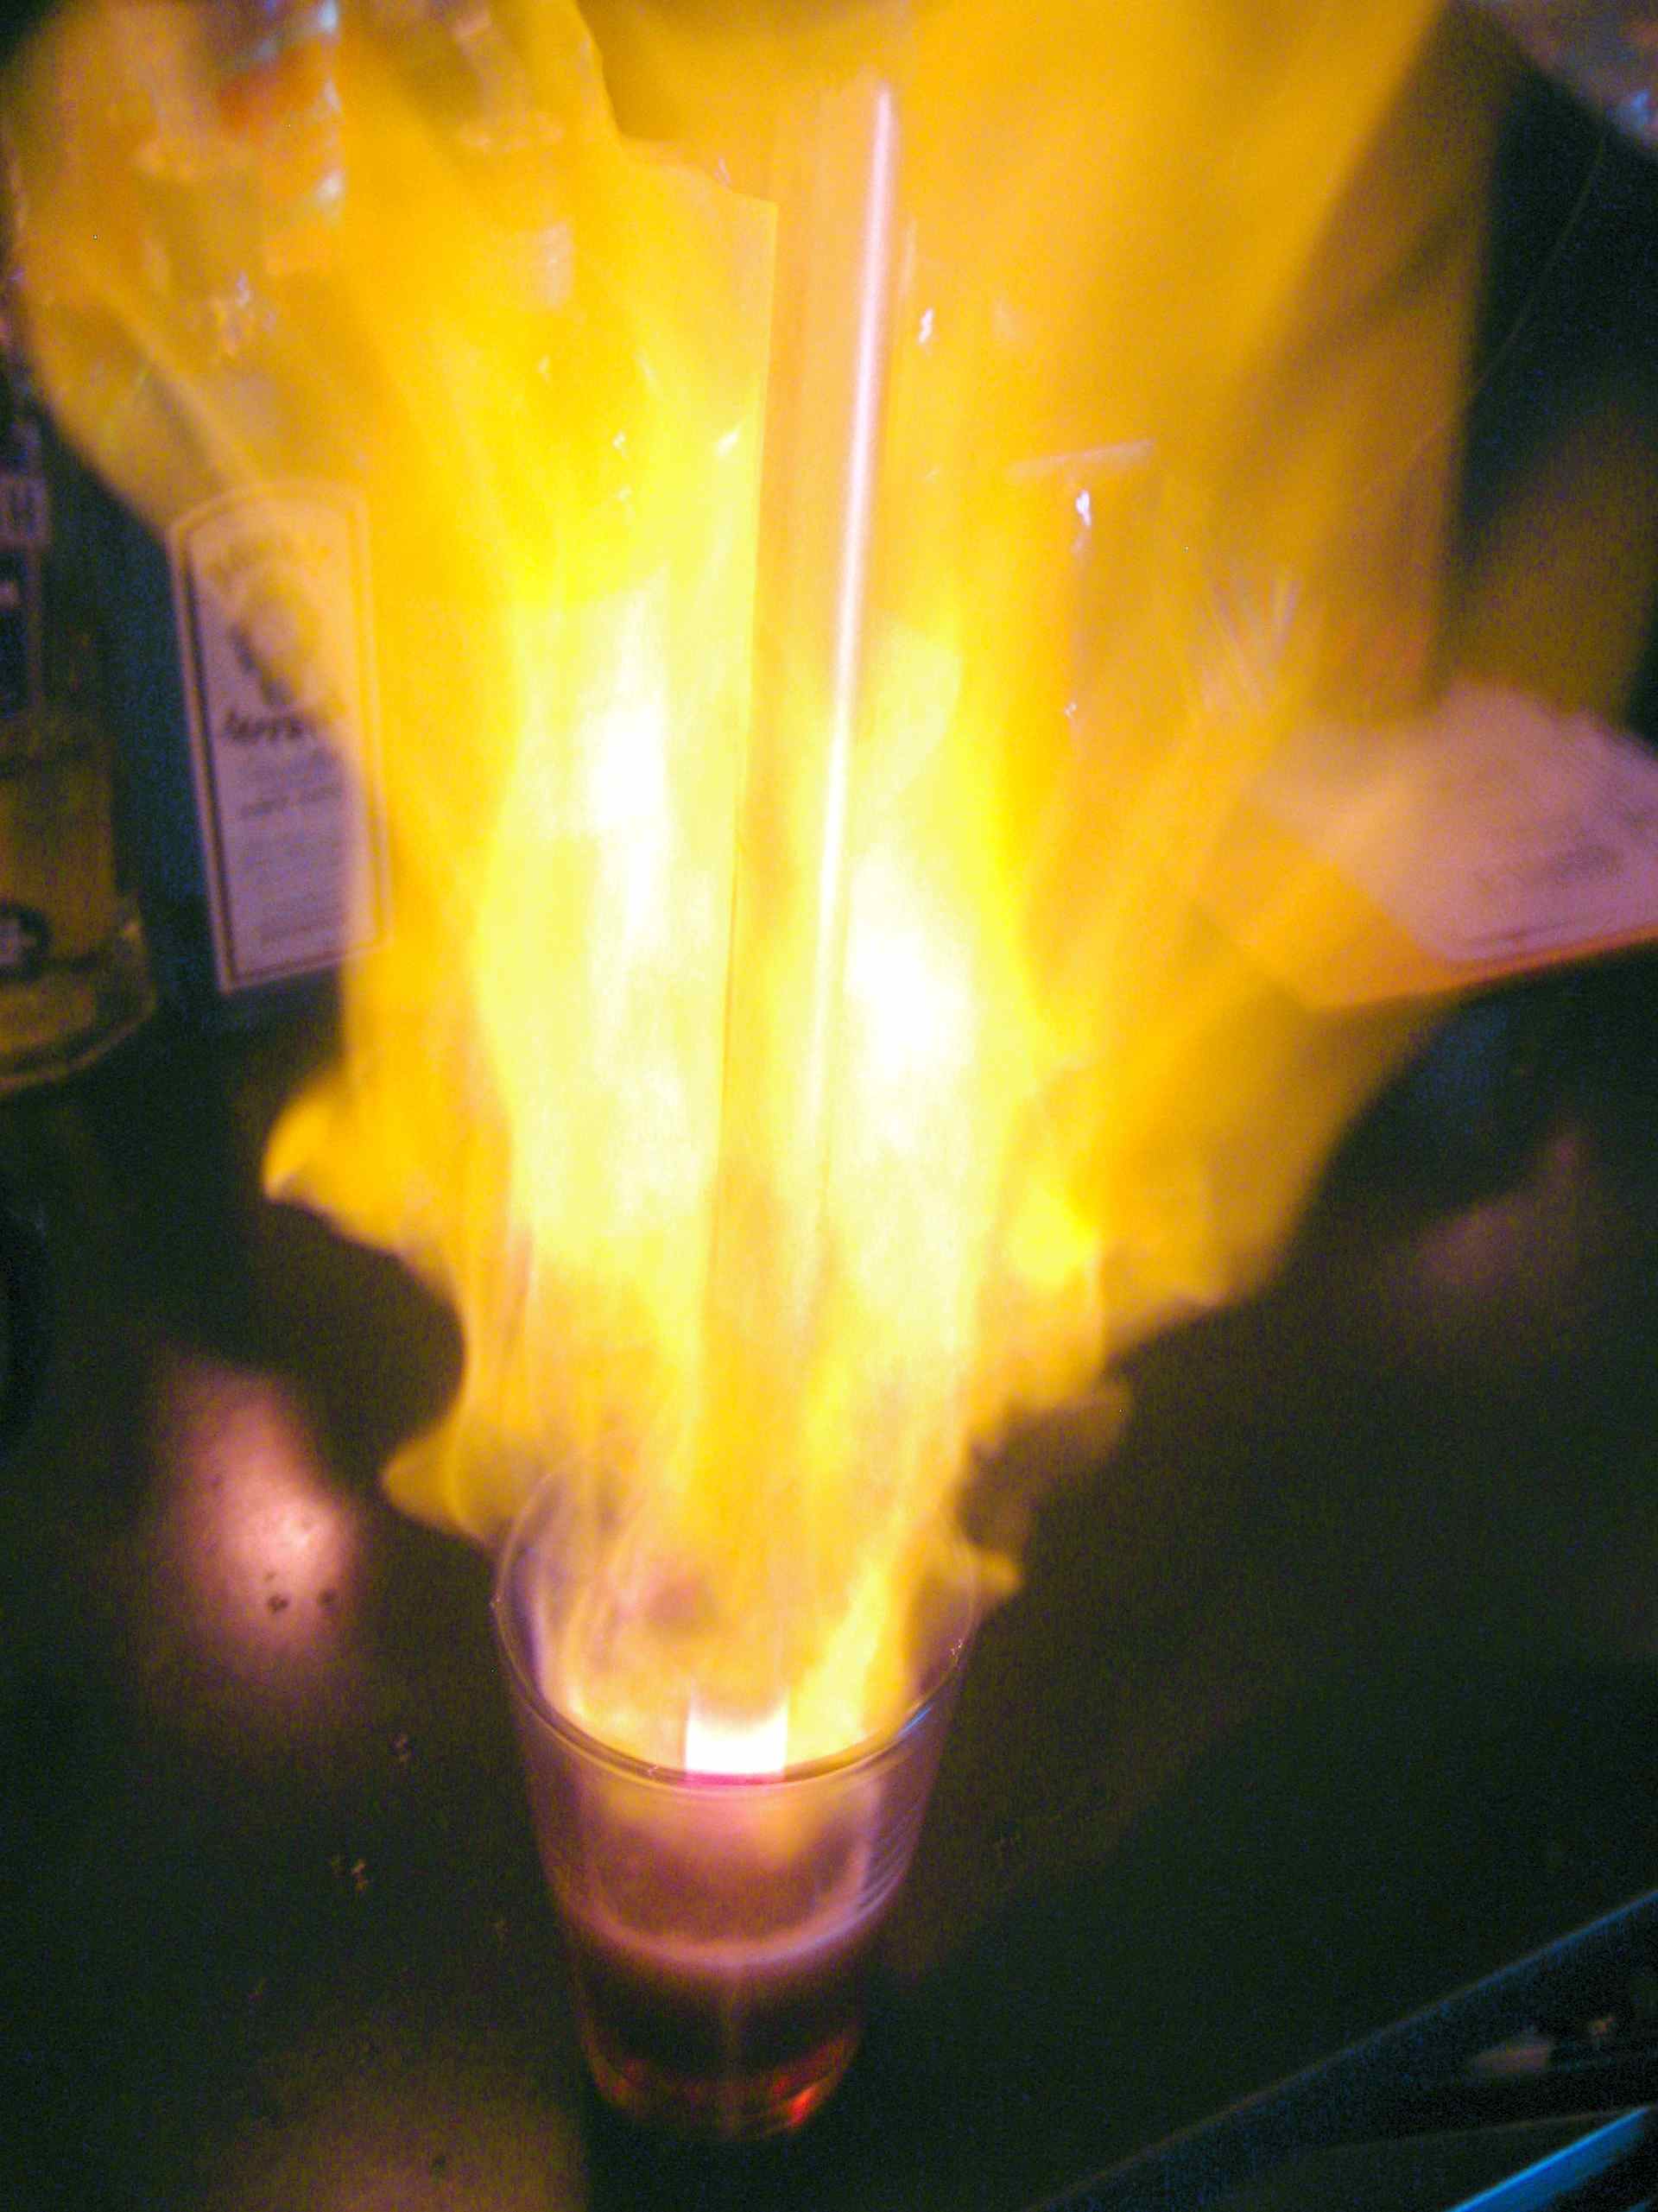
And so he emerged from his workshop with the Red Hot Poker 2009. It looks a little like it fell off an old Soviet satellite, but when allowed to heat beyond red-hot (it starts to get a mesmerizing incandescent ring in the center of the heated end) it will actually ignite a cocktail, sending flames out from the pint glass that we use to heat drinks in that will tickle vs. burn your fingers. It will also heat fast, recover between drinks quickly, and is forgiving enough to allow us to take it to flame-wielding temperatures without burning out. We’ve now come to expect flames erupting from the froth of a heating beverage, as if it were always the way hot cocktails were made. Dave says, “the drink is the drink…†He’s content to just allow the flames to singe his knuckles (bonus: who needs laser hair-removal) while he quietly complains, “Ow. Ow ow. Hot. Ow. Please stop.â€
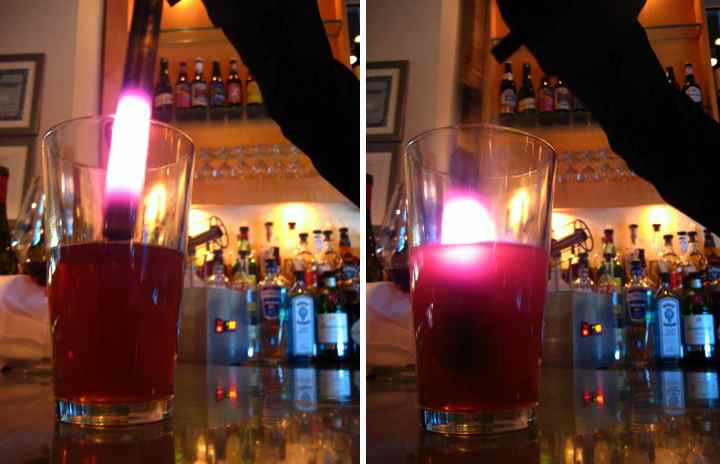
In cold weather, the portable Red Hot Poker sits on the bar of L’Ecole, The FCI’s restaurant, plugged in and glowing away, looking like kitchen equipment meets Battle Bot. Last winter there were two delicious drinks available to try heated: The Red Hot Manhattan and The Red Hot Ale, which is our take on the original “Flip†from colonial times. I don’t want to be sales-y, but both are yummy and a must try. It doesn’t hurt that you get to watch the bartender ignite your drink with a glowing metal rod coming out of R2D2’s distant cousin. This is definitely not the last iteration of the Red Hot Poker, either. Dave has already mentioned his ideas for nothing short of a complete remodel. Who knows what it will be able to do then…

Skål (Skoal): a Scandinavian toast.
For the proper pronunciation, see here.
Akvavit (Aquavit): a Scandinavian distilled liquor usually flavored with caraway.
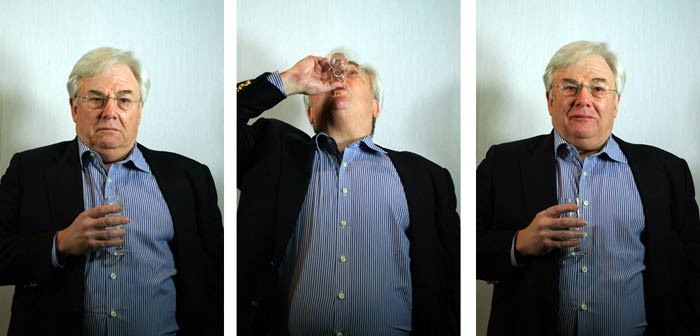
In 1967 the young Swedish actor Max von Sydow, fresh from playing the role of Jesus, posed for a photo triptych demonstrating how to skoal with style:

The photos appeared in “The Cooking of Scandinavia,” one of the books in the amazing Time Life series Foods of the World. The shooter was none other than Richard A. Meek, one of the original roster of Sports Illustrated photographers.
Max is such a badass.
Whenever I discover a fun fact about someone I meet, I’m in the habit of barraging the unfortunate soul with a litany of questions and comments. The new person was Nils when he came on to run The FCI, and the fun fact was: this guy is Swedish. Almost immediately, I whipped out the photos and asked Nils what he thought. Turns out, Nils was a long-time admirer, and right then we figured we had to do something with them. Almost three years later, with the advent of the Cooking Issues Blog, Nils and I have worked out our plan:
The Skoal Project
Concept You can learn a lot about people by how they handle a simple ritual like skoaling. The ritual is rigid, set in stone and unvarying. The art of the skoal discovers the person behind the toast by differences they bring to such a rigid format. With the skoal, like a symphony or a sonata, it’s the structure itself that allows for the art.
Goal
Collect a database of skoal shots from a wide variety of people: friends, family, chefs, artists, actors, writers, musicians, politicians, magnates—anyone of general cultural import or import to us. As we get the photos we’ll share them with you. Eventually we hope to make a book.
Tips
1. Skoaling is serious business. Don’t be goofy; don’t smile like it’s prom night. On the other hand, there is no reason to be morose or look like a psycho. Remember: You are sharing a drink–and a little bit of yourself—with the viewer.
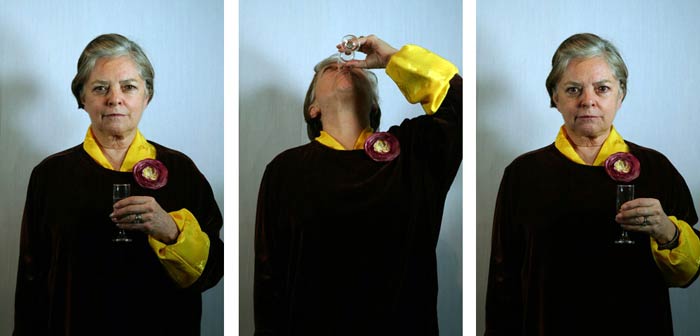
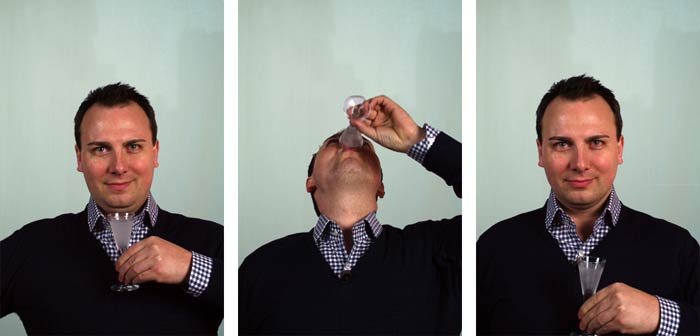
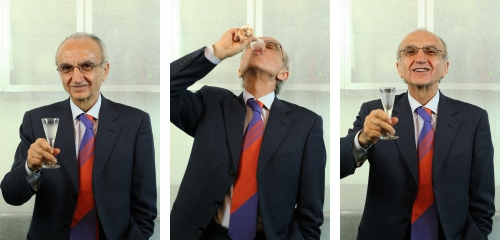
2. For inspiration, look at Max. Photo 1: “Hey, I’ve got something to tell you.†Photo 2: “Hold on a sec.†Photo3: “Done told you.â€
3. Don’t try to be Max. Only Max is Max. Be yourself. We want to learn about you, not your ability to do an impression.
4. Try to look nice. See rule 1.
5. Remember to hold the glass in the right position. Remember to knock the drink all the way back. Remember to bring the glass back to its initial position.
Here is what the book has to say
“Learning to skoal is easy, and it is well worth learning—it adds considerable charm to dining in the Scandinavian manner and assures that an evening will be a success by bringing the guests into visual and verbal contact with each other right off. The ritual varies somewhat in the different parts of Scandinavia. In Sweden, for example, it is a bit more formal, because Swedes follow the custom established by military officers who began the toast by holding their glasses at precisely the level of the third uniform button—but basically it proceeds along simple lines. All that is required is a drink in the hand and a cooperative partner. The proposer of the toast engages the eye of the person being toasted, and “skoal†is said. A slight bow of the head, and a twinkle of the eye—and the aquavit is drained in one gulp (if the drink is wine, a sip is taken). Just before the glass is put back on the table, the eyes meet again and there is another friendly nod.†[Dale Brown, The Cooking of Scandinavia, Foods of the World Series, Time Life Books, 1968, pages 130-131.]
Here is what Nils has to say
The Drinking of the Snaps One of the more important cultural rituals in Sweden is the drinking of the snaps, at least if you are old enough to drink… or not. Snaps is a glass of, hopefully, ice cold aquavit. We take our drinking very seriously in Sweden, and no drinking is more serious the downing of a snaps. A snaps is not something that one nurses and sips on; it can, however, be divided up in either two, three, or four skåls (skål being the act of raising your glass with your fellow companions in the same manner that is so expertly illustrated by Max von Sydow). But dividing it into three or four skåls is nothing I would recommend. No Swedish feast (think Easter, Christmas, or the many others too numerous to mention) is legitimate without a glass of snaps present. So that means if you ever encounter a Swede that does not know how to do a proper skål, it’s not a legitimate Swede.
We plan to post new shots daily. Check out the skoal shots we’ve taken so far.
Check out the full Skål Project here.
What the hell is the Skål Project? Answer.
Our first husband/wife pairing!
Check out the full Skål Project here.
What the hell is the Skål Project? Answer.

Posted by Dave Arnold
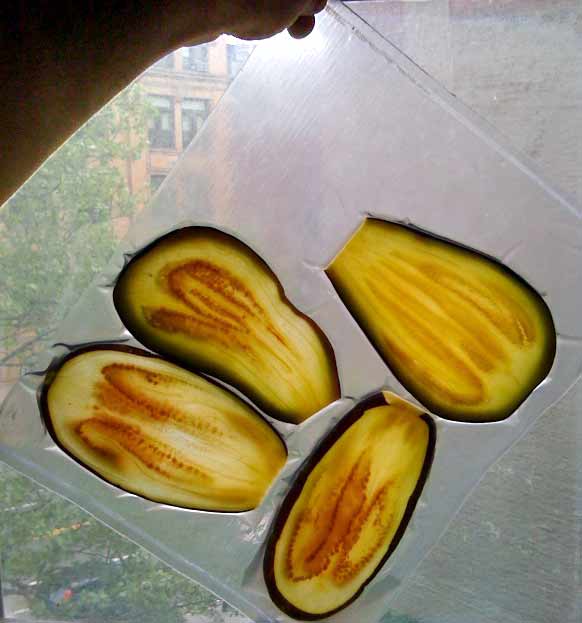
At the FCI we constantly hammer home that technology isn’t only for cutting-edge food. New techniques are just as helpful with old-style comfort food. My wife wanted eggplant parm for Mother’s Day. Eggplant is notorious for becoming greasy. It is a sponge. I used our vacuum machine to make it better. Just salt the eggplant, pop it in a vacuum bag, seal under full vacuum and voila! The eggplant is squished flat—no more air holes to soak up oil. I also added a little ascorbic acid (vitamin C), to make sure they stayed green because I just can’t help myself.
Posted by Mindy Lvoff
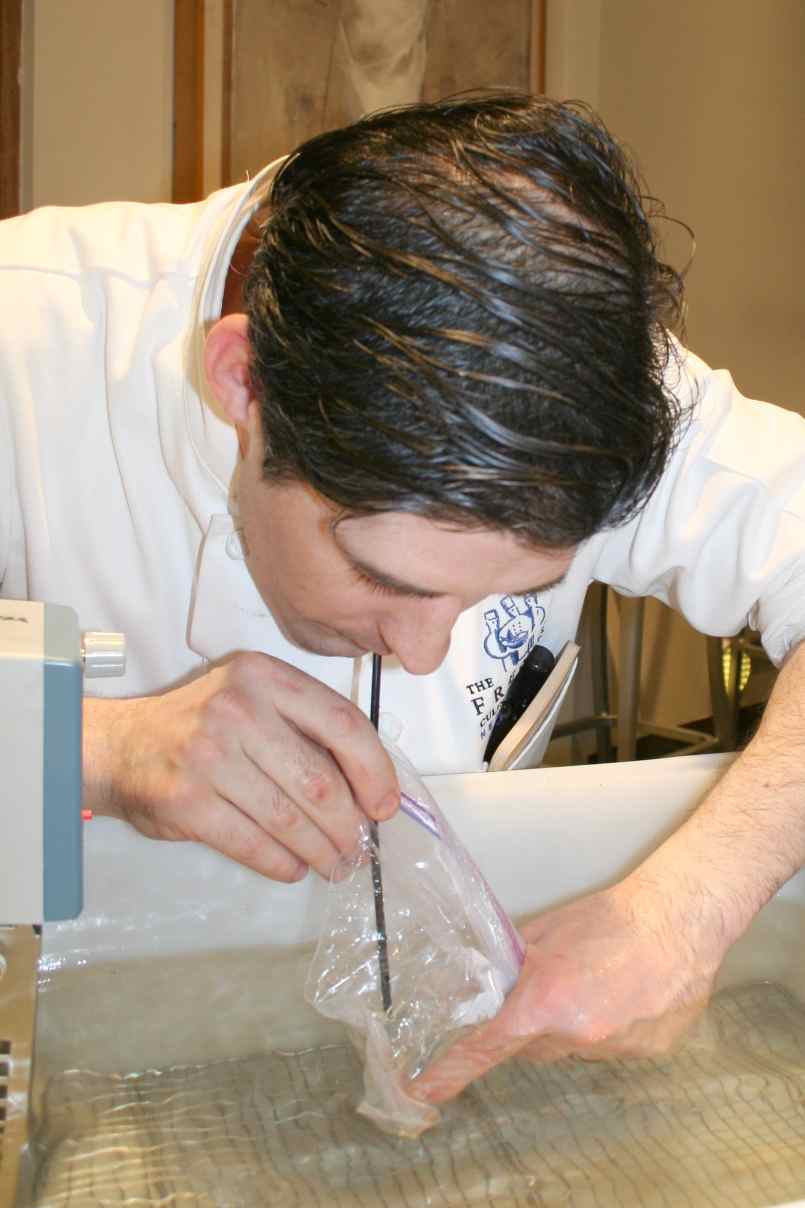
Nils and Dave teach three Advanced Studies courses at The FCI: Hydrocolloids, Harold McGee Lecture Series, and the first class of 2009—Sous-Vide. The two-day Sous-Vide Intensive covers the “what†and history of low temperature and sous-vide cooking (read on for more on why they’re not synonymous), and then spends the majority of the class on the “why†and “how.†True to tradition, the preparation days leading up to this class were filled with agenda re-writes, last-minute custom-building of equipment, threats of quitting, and temper tantrums… and that was just Dave. As previously stated, Nils and Dave are perfectionists who always spend the days leading up to any of their classes rethinking every detail and challenging themselves to make the class better each time.
When the class does finally hit, they always deliver. Only 16 students are allowed in Sous-Vide Intensive, so it becomes a very intimate environment. Nils & Dave prefer when their classes are open forums, with students asking questions throughout. This allows them to constantly tailor the class to the specific interests of those in the room. My favorite part of the class (and I know from speaking with past students that it enhanced their experience as well) is the Dave & Nils banter: Dave making jokes about how Nils loves to make all his food tubular; Nils sarcastically saying “nice job†if/when Dave explodes something; both of them going off on tirades about which foods and equipment bother them, like canned tuna and digital ovens; or the true origins of Porcini mushrooms.
Dave & Nils don’t teach this class out of obligation—they truly love low temperature cooking. Each of them personally owns a PolyScience circulator (about $950) and together have led The FCI to purchase five. Once upon a time, some of the chefs at our school had never used a circulator and were skeptical about doing so. A year ago, we could have all seven circulators to ourselves for days and no one would care. Now, we can barely get our hands on three at a time and within hours, someone comes to us to borrow one. Dave laughs, “The same guys who used to give me crap about using a circulator now give me crap for hogging them! Circulators are like potato chips. You get one and you want more. Once it becomes an option, you’ll use it all the time.â€
Compare our current class to past classes and you can see how prevalent low-temperature cooking is becoming in the industry. Before, many students had heard of, but had no experience with, Sous-Vide. In this last class, every single student either had experience doing low temperature cooking, access to a circulator or some form of steam oven at work, and a few of them even owned their own personal vacuums, circulators and/or combi ovens!
In class, Dave starts out with an intro covering the history—development of sous-vide in 1960s Sweden and the frenemies of sous-vide cooking: George Pralus (worked with the Troisgros brothers cooking foie gras in plastic pouches and serving it in high-end restaurants) and Bruno Goussault (who worked with Joël Robuchon and French railway company SNCF). After another 15 minutes or so of back story, Dave promises to wrap up the segment shortly, “Almost done with this, I swear to God…†he mutters under his breath, gauging both the students’ and his impatience to move on to discussions and demos on the “why and “how.â€

He starts with the Egg Series, his classic method of showing what low-temperature, 0— ΔT cooking means. In traditional cooking, you heat the instrument you cook with to higher than the final temperature you want the object you’re cooking to achieve. That difference between, let’s say, the oven’s temperature and the chicken’s final temperature (T) is the Δ (delta/difference). The immersion circulator allows us to cook without that difference by constantly regulating the temperature of a water bath (a much better heat conductor than dry oven air or oil/fat) by circulating it through a heating coil attached to a thermal couple. Simply set the circulator temperature to the end temperature of what you are cooking.

Dave cracks out eggs that have been cooked by circulated bath for an hour set at varying temperatures, ranging from 57°C (basically raw) to 70°C (hard-boiled, right before it gets that green ring around the yolk). As he moves up the temperature range, students begin to understand how each degree change in temperature makes a difference. He cracks out perfectly poached 62°C eggs and then shows his favorite 63°C “custard eggâ€â€”so named because of the creamy consistency of the yolk, which cannot be achieved with conventional cooking. Yolks at 64-66°C have a playdough consistency. (Dave suggests molding a playdough yolk into a small animal figurine for your next plating… Maybe not.)
The Egg Series demo is the “ah ha!†moment for most people. As Dave cracks out several 62°C eggs, perfect Eggs Benedict or toast-poached eggs, you start to see service-related benefits. No more simmering whirlpool with a drop of vinegar in it. The only limit on how many eggs you can cook at once is how many you can fit into your bath comfortably. During service, you can plate as soon as you can crack open the egg. And that’s just for eggs…

The class speeds on from there and students are able to see the affects of low-temperature and sous-vide cooking on different types and cuts of proteins. Someone once asked me which I preferred: a sous-vided short rib or a slow braised short rib. If you have to ask that question, then you have obviously never had a two-day, sous-vided 57°C short rib! It’s the difference between dry well-done meat and a beautifully tender, juicy, medium-rare bite of short rib. That’s the beauty—the sous-vided shortrib is cooked for two days, dissolving tough connective tissue, yet can still be served medium rare. In the class, students get to see and taste the difference. Nils serves up Swedish Meatballs composed of ground beef, pork and lamb that have been flash-fried in beef fat, packed in beef fat in a ziplock bag with as much air removed as possible, and circulated. Once out of the bag, they are flash-fried in beef fat one more time. At first, I wasn’t sure how I felt about the perfect, tender texture and juiciness of the sous-vided meatball. Then, I tasted a traditional meatball expecting to prefer its harder, denser texture. Still delicious, but now I know what I’m missing…

Class also includes a primer on Transglutaminase, or meat glue as it’s affectionately nicknamed by chefs. No, it’s not glue, but an enzyme that bonds proteins together. To quote Dave, you can use it to “glue chicken to cow to pig to donkey to horse to fish to scallop to anything.†(Please don’t post comments on animal cruelty; we’re not gluing donkeys to horses—I promise.) Nils continues, “You can glue chicken to salmon if you wanted, but it’s the worst idea in the world.†To demonstrate what a good transglutaminase idea is, they glued chicken skin to skirt steak and then deep-fried it to make the best damn Chicken-Fried Steak that you’ll ever have. The class is also lucky enough to get a lesson on rolling chicken or salmon into tubes from the tube expert himself, Nils. Tubes allow for perfect portioning (discs of equal weight and size) of whatever protein you’re cooking.


“The sitting portion of this class is now over!†Dave commands in order to get everyone out of his or her seat to get a closer look at the vacuum. Dave explains the vacuum chamber and how pressure and air are removed, then reintroduced, and what affect that has on what’s inside the chamber, i.e., porous items in a liquid bath or bag or whatever else. Students get to witness texture modification and vacuum infusion, and see elements of that afternoon’s dishes and cocktails being prepared. Apple cubes are placed in a container of chilled, bright yellow curry-infused oil and vacuumed. Students watch as air from tiny pores within the apple escape out of the chilled oil, bubbling its surface. The apples are allowed to sit under vacuum until it appears that most of the air has escaped, i.e. the bubbles have stopped. When air and pressure are reintroduced into the chamber, the curry oil is forced into the empty voids in the apple created by the vacuum, and the cubes become bright yellow and translucent.

Pressure cookers (aptly named) are another great example of how pressure is used in cooking. We used it to trigger the alkaline reaction in Hamine Eggs in about 30 minutes, not the traditional preparation which requires eggs to sit overnight. Our eggs are then used to turn a classic into a modern masterpiece: Deviled Hamine Eggs. I can take down a whole tray of these treats, but luckily there are never that many left over for me to do so.


Carbonated Cocktail with Flash-Pickled Watermelon Rind
As always with a Nils and Dave class, a cocktail is served at the end of class… and it’s always served in a liquid nitrogen-chilled glass (have liquid nitrogen, will use). It’s a reward to students and staff alike for making it to the end of an information-packed day. It’s not a bad way to help wash down an afternoon’s worth of meat tasting, either. Delicious, infused, carbonated liquors garnished with texture modified fruits (or flash-pickled watermelon rinds—my favorite), also seem to be a great way to coax students into asking questions that may have not come up yet during the class.
I can’t stress enough that the best part of this—and all of Nils and Dave’s classes—is the interactive environment. I’ve been asked so many times what it’s like to work closely with Nils and Dave—this is probably one of the best ways to get that experience yourself. There’s no better opportunity to observe how they work, what their thought process is, or to ask them questions about your own cooking techniques. The goal of the class is to provide the foundation necessary to start using low temperature and sous-vide (if you are HACCP-ly able) techniques on your own. Nils and Dave try and stay as long as possible to answer any lingering questions, especially since questions emailed to Dave later “might as well be sent to a trash can.†He would love to be able to answer them, but email is just one of those things our resident-genius can’t seem to get a handle on.
Of course the only real way to experience this class is to actually take it! Luckily, the Sous-Vide Intensive class is being taught again on May 28th & 29th. The class is limited to 16 participants, so if you are interested in taking the class, I highly recommend that you contact the school to reserve your place as soon as possible. For information about this class and all of Food Technology classes offered, please visit our Advanced Studies page.
Posted in sous videTagged advanced studies classes, carbonation, flash-pickling, hamine eggs, immersion circulator, liquid nitrogen, low-temperature, meat glue, pressure cooking, texture modification, Transglutaminase, vacuum infusion
Posted by Sophie Brickman
Purpose: Demonstrate how to use technology to improve and expand your dishes
Techniques: Vacuum-infusion, Distillation, Carbonation, Hydrocolloids, Low-Temperature Cooking, Liquid Nitrogen
Menu
Deep-fried scrapple w/ maple-infused cabbage, sauerkraut, and 62°C poached quail egg
Mokume-gane fish with liquid-nitrogen-powdered dill crème fraîche, pressure-cooked mustard seed, pumpernickel toast, Aleppo oil-infused apple and cabbage salad topped with flash-pickled red onion
Sliders circulated in duck fat and finished over a charcoal grill with pickled ramp and cheddar Mornay sauce, ketchup, and served on toasted brioche bun topped with pretzel salt and caraway seeds
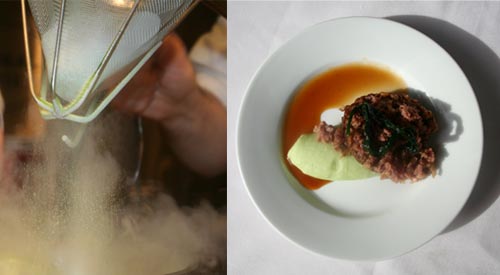
Circulated haggis with liquid-nitrogen-powdered ramp green mashed potatoes, sauteed ramp greens, and sauce made of veal demi and chicken stock
Caramel apple float: dulce de leche ice cream w/ sous-vide creme anglaise base, carbonated clarified fresh granny smith juice
Gin n’ juice cocktail: carbonated clarified strawberry juice, Hendrick’s gin & Solerno blood orange liqueur, lime acid, simple syrup, salt
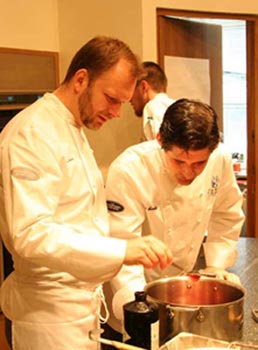
This was my first time attending a Dave/Nils presentation as part of the what I shall heretofore call Dave’s “Merry Band of Culinary Technological Pranksters†(MBOCTP)—aka I am now Dave’s intern and follow him around a few days a week as he teaches me how to use the rotovap to distill liters of infused alcohol (yep, kind of illegal) or feeds me gymnemic acid (which erases your ability to taste anything sweet), and then whizzes from one floor of the school to another in search of anything sweet, which he demands I eat. (This sugar tastes like sand. Gee, thanks, Dave.) When I arrived in The FCI’s ampitheater, Dave handed me a high-tech camera with fifteen gazillion buttons and adjusters for light and depth and lord knows what else and told me to take pictures. He asked me if I could handle it and I grinned and nodded idiotically, then rushed away and spent the next five minutes trying to locate the shoot button, which I thankfully found right before the demo began.
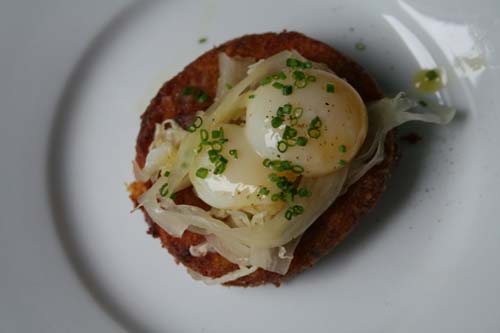
First up was deep-fried scrapple (mix of pork sausage, bacon, ham hock moistened with pork trotter stock) with maple-infused cabbage, sauerkraut, and a 62°C poached quail egg. The scrapple loaf was sliced in ½-inch rounds and deep fried (“God’s preferred way of cooking,†says Dave), which gave the savory cake a delectable crunch. Paired with the sweetness of the maple-infused cabbage, the salty tang of the sauerkraut, and the warm gooeyness of the perfectly poached quail egg, this was not your basic let’s-throw-all-the-scraps-of-the-hog-we-don’t-want-into-a-mush, no siree. Audience members quickly lapped up their portions, and those culinary students who had already made it through the daylong lesson on eggs sighed, in awe, at the sight of a poached egg which you can crack open onto a plate. No swirling, no vinegar, no eggy wisps. Just a gentle crack. Ahh.

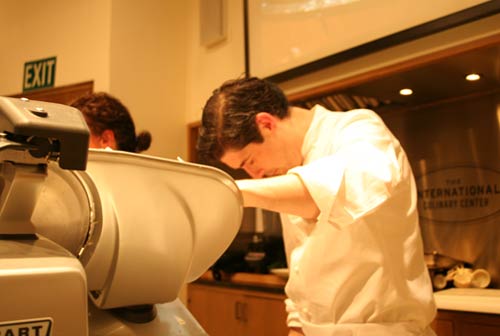
Next up was Dave’s famous Mokume-Gane fish, with liquid-nitrogen-powdered dill crème fraiche, pressure-cooked mustard seeds, pumpernickel toast, and Aleppo oil-infused apple and fennel salad topped with a flash-pickled red onion. Dave developed this dish for a demo he did recently for StarChefs on the Hobart 3000 slicer. Instead of slicing ham (which he admits is one of his favorite things to do), he decided to use frozen fish to mimic an ancient Japanese welding technique (but of course) to show everyone how fantastic the slicer is. At the demo, a small glitch occurred when tasting were passed to the audience without the elaborate garnish. This caused Dave to “have a moment,†but once this was remedied, everyone was quite pleased.
The next savory dish was a knockout: sliders circulated in duck fat and finished over a charcoal grill, served with ketchup, pickled ramps, and cheddar Mornay sauce. For the bun, Dave and Nils made a mini Kaiser-type roll topped with pretzel salt and caraway seeds (a nice nod to Nils’ heritage). When Dave and Nils discussed that they may get a booth-for-a-day at Coney Island to serve the sliders to a bigger crowd than FCI students, I heard at least one audience member say that he wanted to invest. Things were going great until I popped into the back kitchen to grab some ramps for Nils to show the audience and found Mindy frantically spritzing something on the back of her neck. Cooling Evian? A little perfume to freshen up? Nope. Burn spray. Apparently someone had somehow sprayed the back of her neck with bacon grease. I didn’t ask.
Buried at the end of the savory presentation was the tough sell: haggis. The dish everyone associates with the leftover nasty kinds of meat, ground up and shoved in an animal’s stomach, then boiled. Meh. Dave tried to avert everyone’s worst fears by informing them that he wasn’t going to be serving “any lips and butthole mush,†but people were still skeptical. He tried a different tactic: “If I told you I was taking meat and grinding it up and putting it in intestine, you’d say ‘No way!’ Oh yeah? That’s sausage. So when I tell you I’m grinding up meat with oatmeal, that sounds pretty good, doesn’t it? Yeah, that’s haggis.†The real test came when the dish was
served: circulated haggis (pork and lamb tongue, liver, heart, and leg; no stomach required) with liquid-nitrogen-powdered ramp green mashed potatoes, sautéed ramp greens, and a sauce made from veal demi, chicken stock, pork, and lamb, in which Nils and Dave cooked the steel-cut Irish oats and then drained it. Everyone ate their haggis, and two people openly admitted that they had become haggis converts. Two people is big… when it comes to haggis.
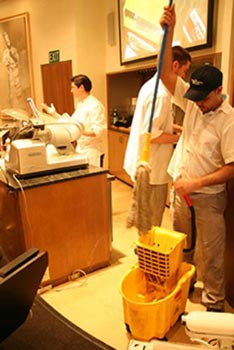
Though we averted the frozen fish disaster and the bacon-grease-on-Mindy’s-neck disaster, Dave’s MBOCTP knew there had to be more… and of course, right around the time when everything seemed to be running smoothly, water started pouring out of the A/V control room. Turns out a leaky coffee machine hadn’t been correctly fixed. Here you can see Dave valiantly continuing on through his demo despite the slight distraction.
The dessert for the day was a caramel apple float, made with dulce de leche ice
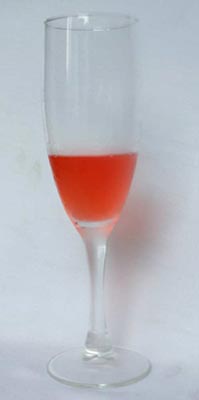
cream with a sous-vide crème anglaise base, and carbonated clarified fresh Granny Smith juice. The ice cream was made, as Dave said, “the standard way†(scoff), by pouring dulche de leche into a KitchenAid and adding liquid nitrogen. Dave carbonated the apple juice using a CO2 can. So much better than Fizzy Lizzy.
As usual, the parting gift of the Dave/Nils demo was an alcoholic beverage: a gin n’ juice cocktail, made with carbonated clarified strawberry juice, Hendrick’s gin, Solerno blood orange liqueur, lime acid, simple syrup, and salt. Everyone went away happy, full, and a teeny bit buzzed. Perfection.
Posted in Tech DemoTagged carbonation, distillation, hydrocolloids, liquid nitrogen, low-temp, rotovap, vacuum infusion
Check out the full Skål Project here.
What the hell is the Skål Project? Answer.


Posted by Mindy Lvoff
The Philoctetes Center is an organization that strives to bring together thinkers from various scientific and artistic backgrounds to discuss the processes and factors that influence a final outcome, whether that be technological innovation and artistic expression, or negative outcomes such as violence and genocide. Thought leaders from academic, clinical, and artistic disciplines discuss and debate these factors in order to further the collective’s understanding and appreciation of the imaginative process and journey of creativity. In 2007, Nils was invited to participate in one such discussion called “Perception and Imagination: Masters of the Senses.” Selected as a “taste master,” he was part of a panel that included a slight-of-hand artist, a sound engineer, a master perfumer, a painter, and a neurologist.
On Monday, May 11th, Nils invited the Philoctetes organization to The French Culinary Institute for another discussion involving the senses: “Food for Thought: The Je Ne Sais Quoi of Taste.” This time, Nils and Dave teamed up with Stuart Firestein, Neurobiology professor in the Department of Biological Sciences at Columbia (see his Skoal shot here). According to the Philoctetes Center, his lab seeks to better understand the molecular, genetic, and physiological mechanisms that make the vertebrate nose the best chemical detector on the planet. Together, Nils, Dave, and Stuart held a demo and tasting for a 60-person, mixed audience of musicians, financiers, painters, academics, etc. in order to whet their appetites for discussion.
A tasting of our house-distilled Habanero Vodka served to challenge the correlation between scent and taste. When you hold the glass of clear liquid to your nose, spicy habanero wafts up at you, threatening to irritate your eyes. Upon tasting it, however, there is an absence of any spice whatsoever, revealing only the sweet perfume of the formerly fiery habanero. In fact, even though it lacks sugar, you could swear that the drink you are sipping has a sweet finish. Distilling a mixture of puréed habaneros in vodka using our rotary evaporator (rotovap) allows us to pull out the aroma and flavor profile of the habanero while leaving the heavy capsaicin solids behind. In fact, the remaining capsaicin and habanero pulp have absolutely no odor. However, tasting it (if you dare) is like eating pure lava. None of the redeeming flavor notes are left—just fire. And without any odor to warn you that what you are about to taste is incinerating, the mixture is deadly. This has led us to label any saved solids “Death Bucket.”
Nils prepared one of my favorite of his creations, his kombu-marinated duck breast. Without his dedication to his own sense of taste, this dish may never have been created. In Japan, kombu seaweed is traditionally only combined with seafood. However, Nils recognized that the umami flavor of the seaweed would pair brilliantly with the sweet earthiness of duck. He rolled the duck breast (yes, another Nils tube) in kombu and vacuumed it to infuse overnight before cooking it sous-vide for an hour at 57°C, then finished it in a pan to just crisp its fatty skin to a luscious golden-caramel color. Nils previously explained that when a Japanese chef saw him unrolling the kombu-wrapped duck, he told Nils that he was crazy. Kombu is only used on seafood. Nils is a man of few words and arguing is definitely not something he enjoys. Instead, he sliced the chef off a piece and let the chef judge for himself. Anyone in Monday night’s audience who sampled the sweet and savory flavor of kombu married with the gamey-sweet flavor of the duck knows that Nils won that silent argument hands-down.
The duck was served with smooth, garlic & oniony ramp mashed potatoes. The micro-speckled green mashed potato is achieved using liquid nitrogen. Ramp greens are quickly blanched, shocked, and drained to retain the vibrant color before being combined with liquid nitrogen in a Vita Prep blender. Once strained through a coffee filter-lined chinois, the powder is then dusted on and folded into mashed potatoes. Besides the visually stunning appearance, the flavor is incredible. The ramp greens, blanched only briefly, retain a potent ramp flavor, and because it is powdered with liquid nitrogen, the texture of the mashed potatoes isn’t compromised by any stringiness. Together with a savory-sweet, perfectly tangy mushroom sauce, the kombu duck and ramp mashed potatoes made for an incredible flavor combination leaving many in the audience asking for seconds.
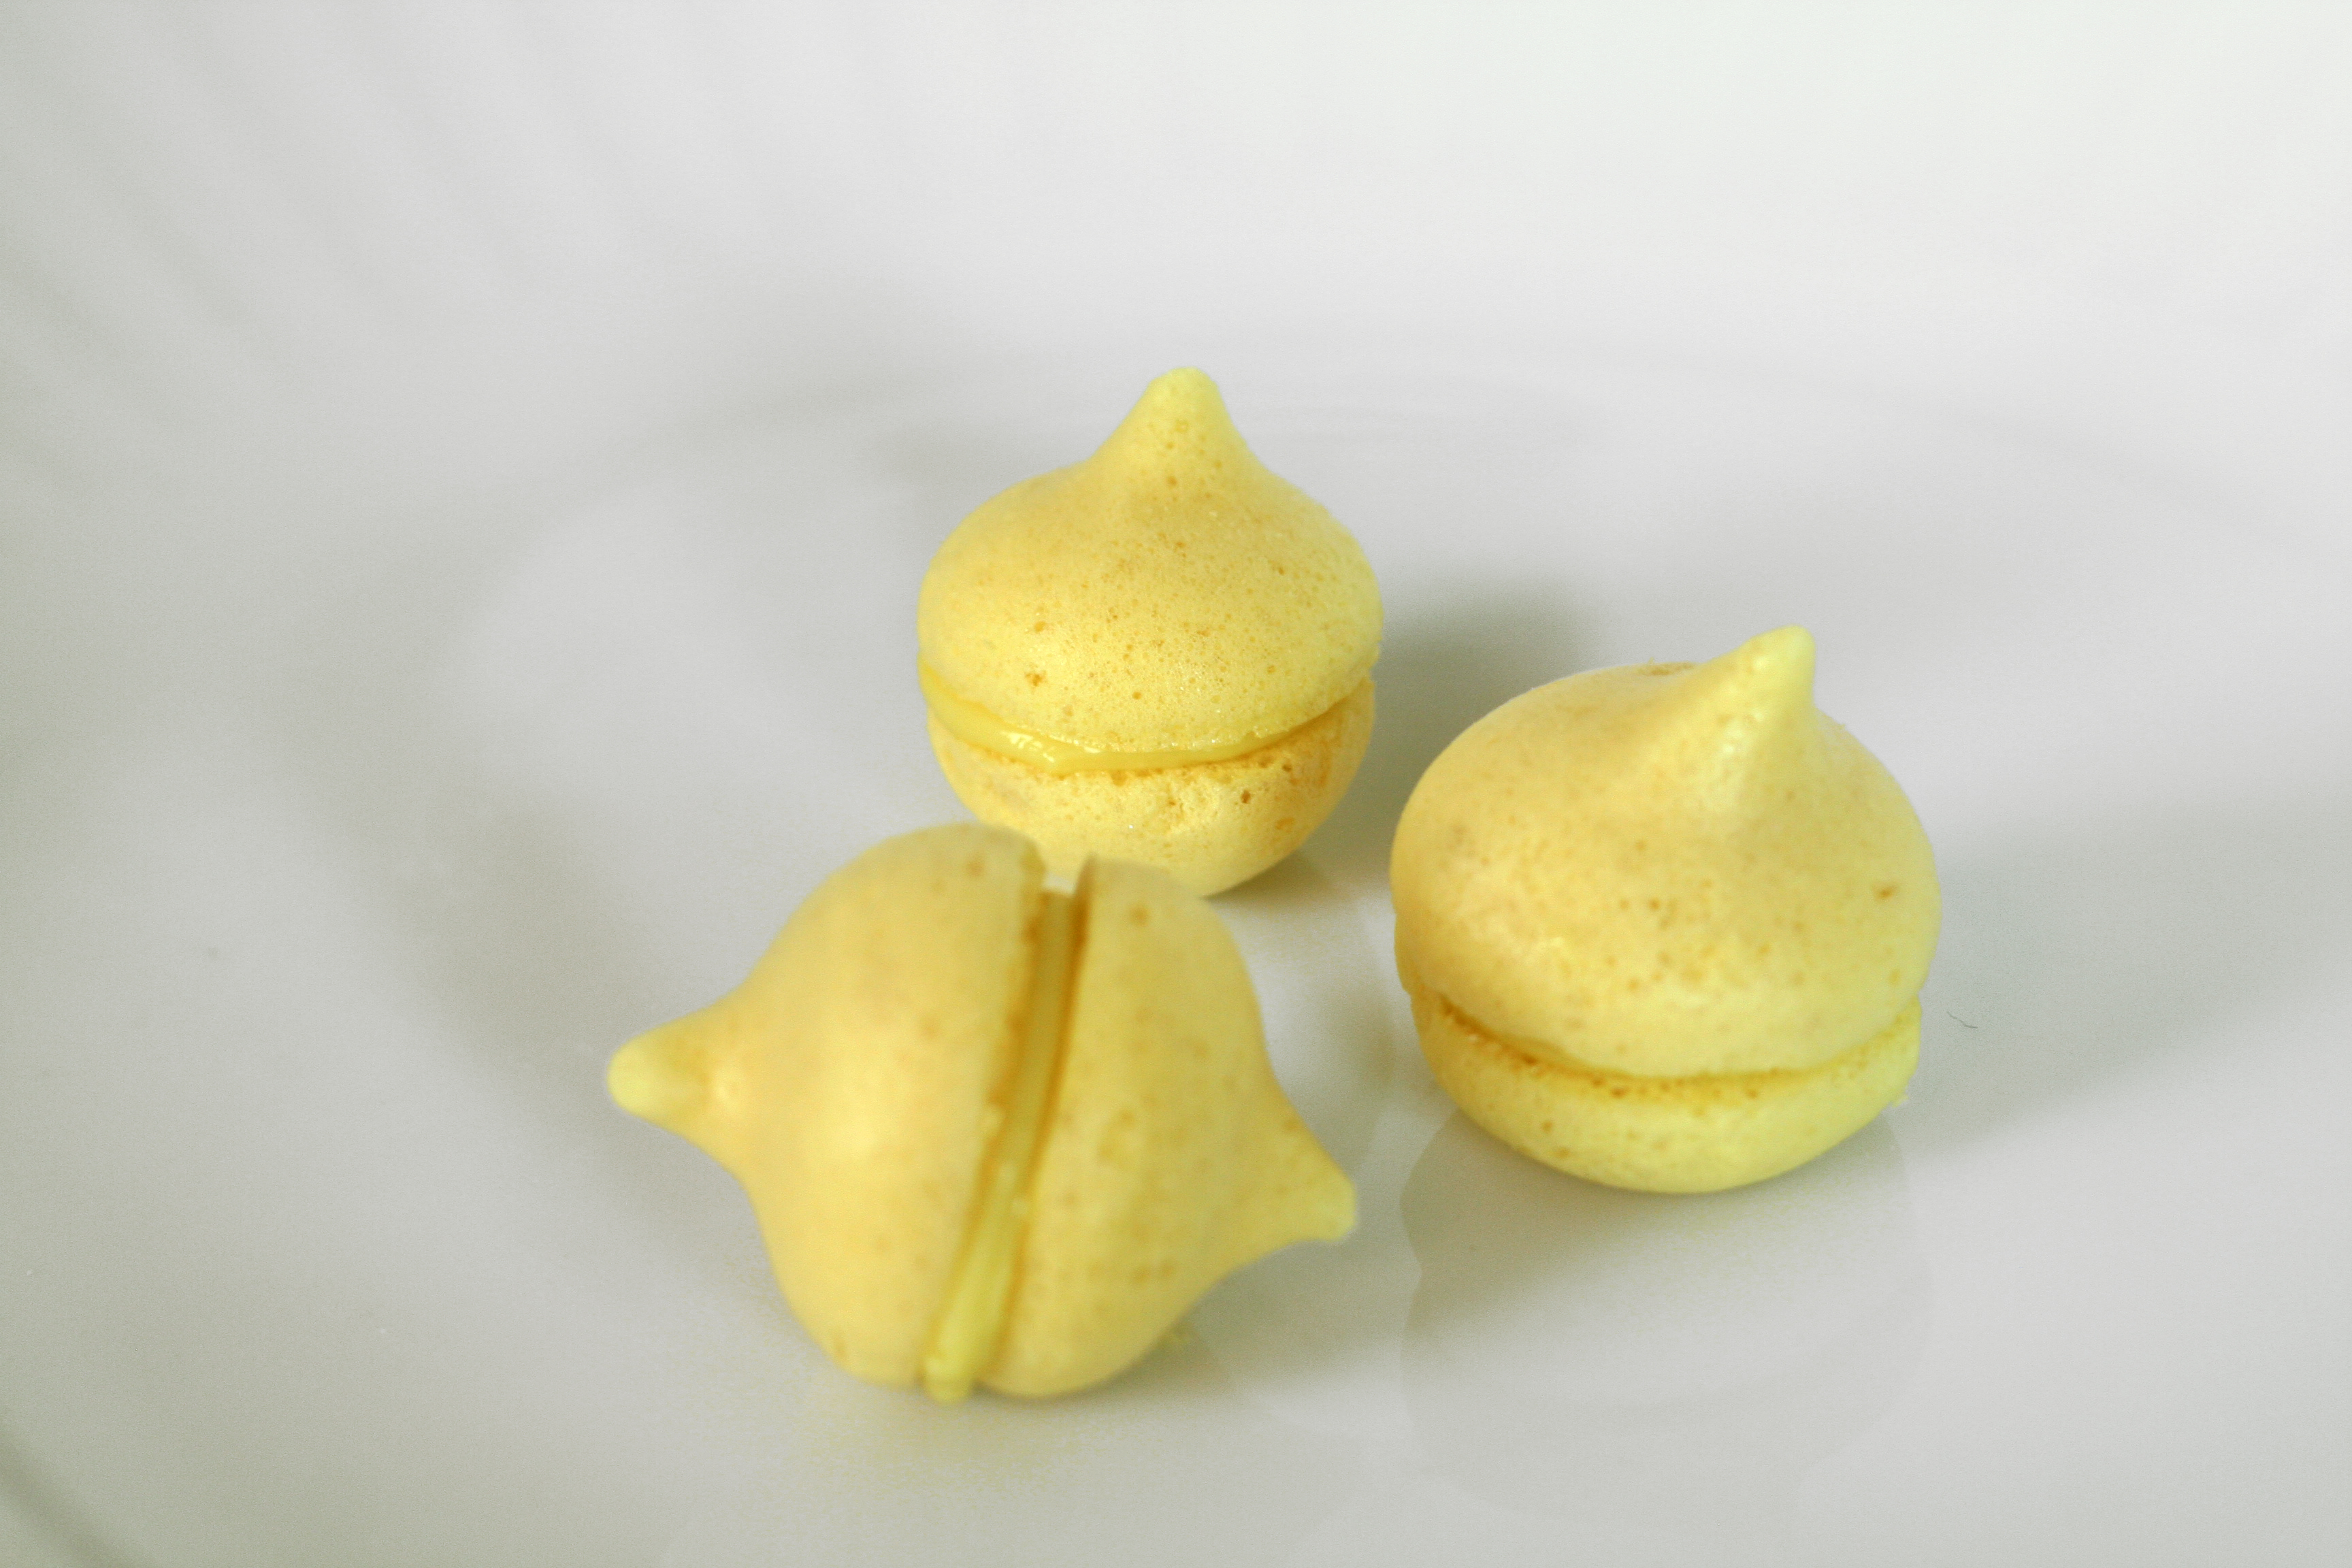
For dessert, passionfruit methocel meringues were served with fennel and white chocolate ganache. These meringues take most people by surprise the first time they taste them. Made with Methocel F50 instead of egg whites, these meringues are basically pure, sweetened passionfruit in every airy, crispy bite. Their tartness makes you instantly pucker. However, balanced with mildly sweet, fennel-perfumed ganache, the two elements combine to create a perfect harmony of sharp acidity softened by buttery creaminess. Interests thoroughly sparked and appetites for discussion peaked, the 60+ participants were ready to embark on a passionate (no pun intended) discovery of the nature of taste for themselves.
Posted by Mindy Lvoff
Purpose: Make tobiko-sized hydrocolloid beads
Technologies Used: Hydrocolloids, Emulsifiers
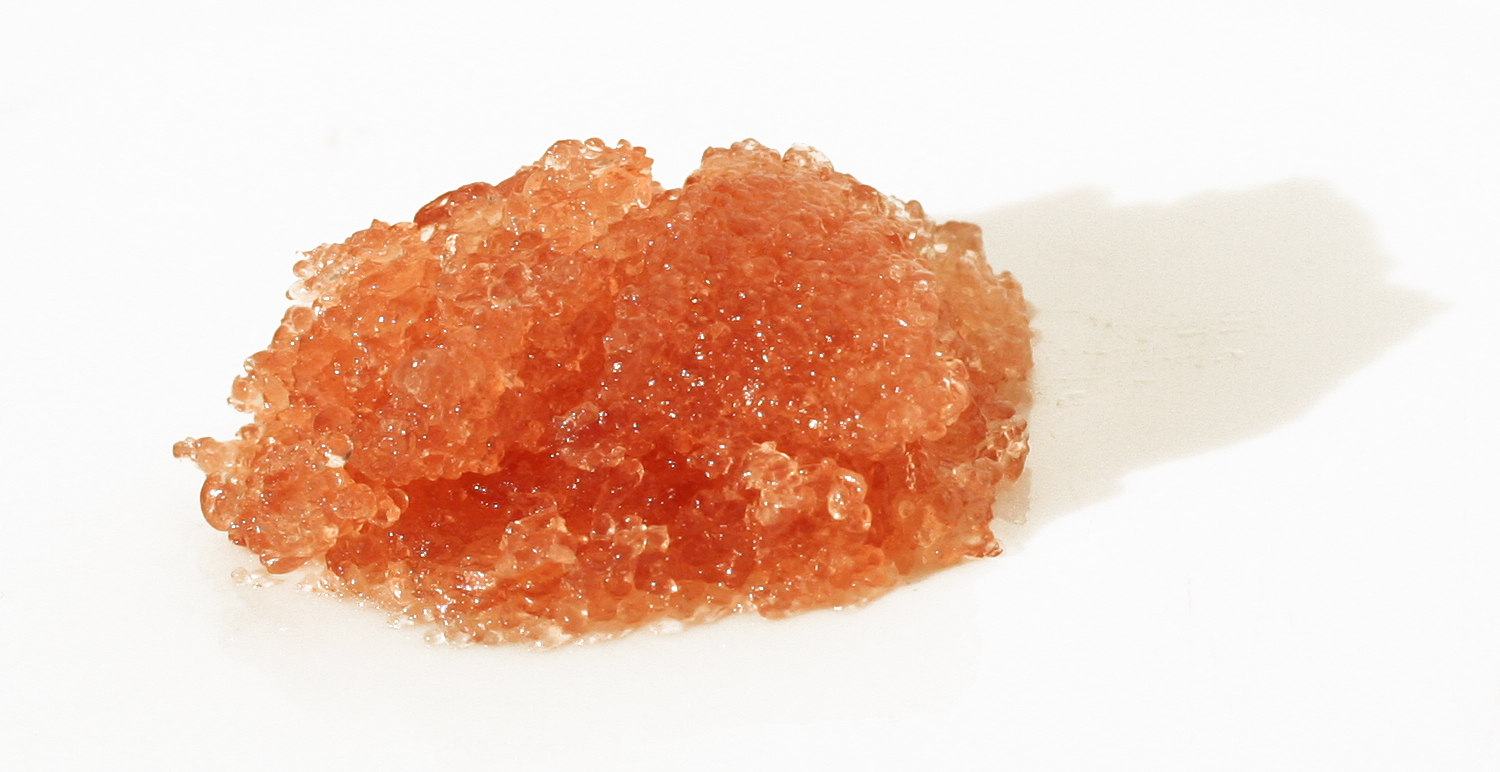
During our two-day Hydrocolloids class at the French Culinary Institute, students inevitably want to know how to make “caviar†beads. Whether using agar or alginates, and no matter how steady your hand, you inevitably end up with Ikura or salmon roe-sized spheres. Actually, if you’re just starting out, you end up making salmon roe-sized tadpoles—spheres with little tails. After students take turns trying to out-sphere each other, the same question always comes up: How do you make smaller, flying fish roe or tobiko-sized caviar? Until now, Dave had a theory on how to do it, but never a definitive answer. This time, the night before class started, it was time to put his theory to the test.
Glycerin flakes don’t contain glycerin. They are actually monoglycerides and diglycerides used to emulsify fat and water. Texturas markets them as “Glice†flakes and, unfortunately, Terra Spice calls them “Glycerin Flakes†to keep the naming convention. One more time: glycerin flakes are monoglycerides and diglycerides. When dissolved in oil (fat) heated above 60°C and mixed into vinegar, the glycerin flakes emulsify and stabilize a mixture. Dave wondered what would happen if you mixed the ingredients in the reverse, i.e., whisk the vinegar into the oil.A light bulb went off (probably a giant halogen bulb, tantamount to the high-beams on an SUV in the middle of the night) and he began to think about cold oil spherification (caviar balls)… With mayonnaise, oil is dispersed in/whisked into water and then suspended, making water the “continuous phase,†which basically means that micro beads of oil are suspended in water. Dave theorized that you could make oil the continuous phase by whisking a mixture of agar and vinegar into the monoglyceride and diglyceride-spiked oil, thereby suspending tiny beads of the agar vinegar. Perhaps you could find a way to recover those beads from the emulsion, meaning you would end up with tobiko-sized caviar!
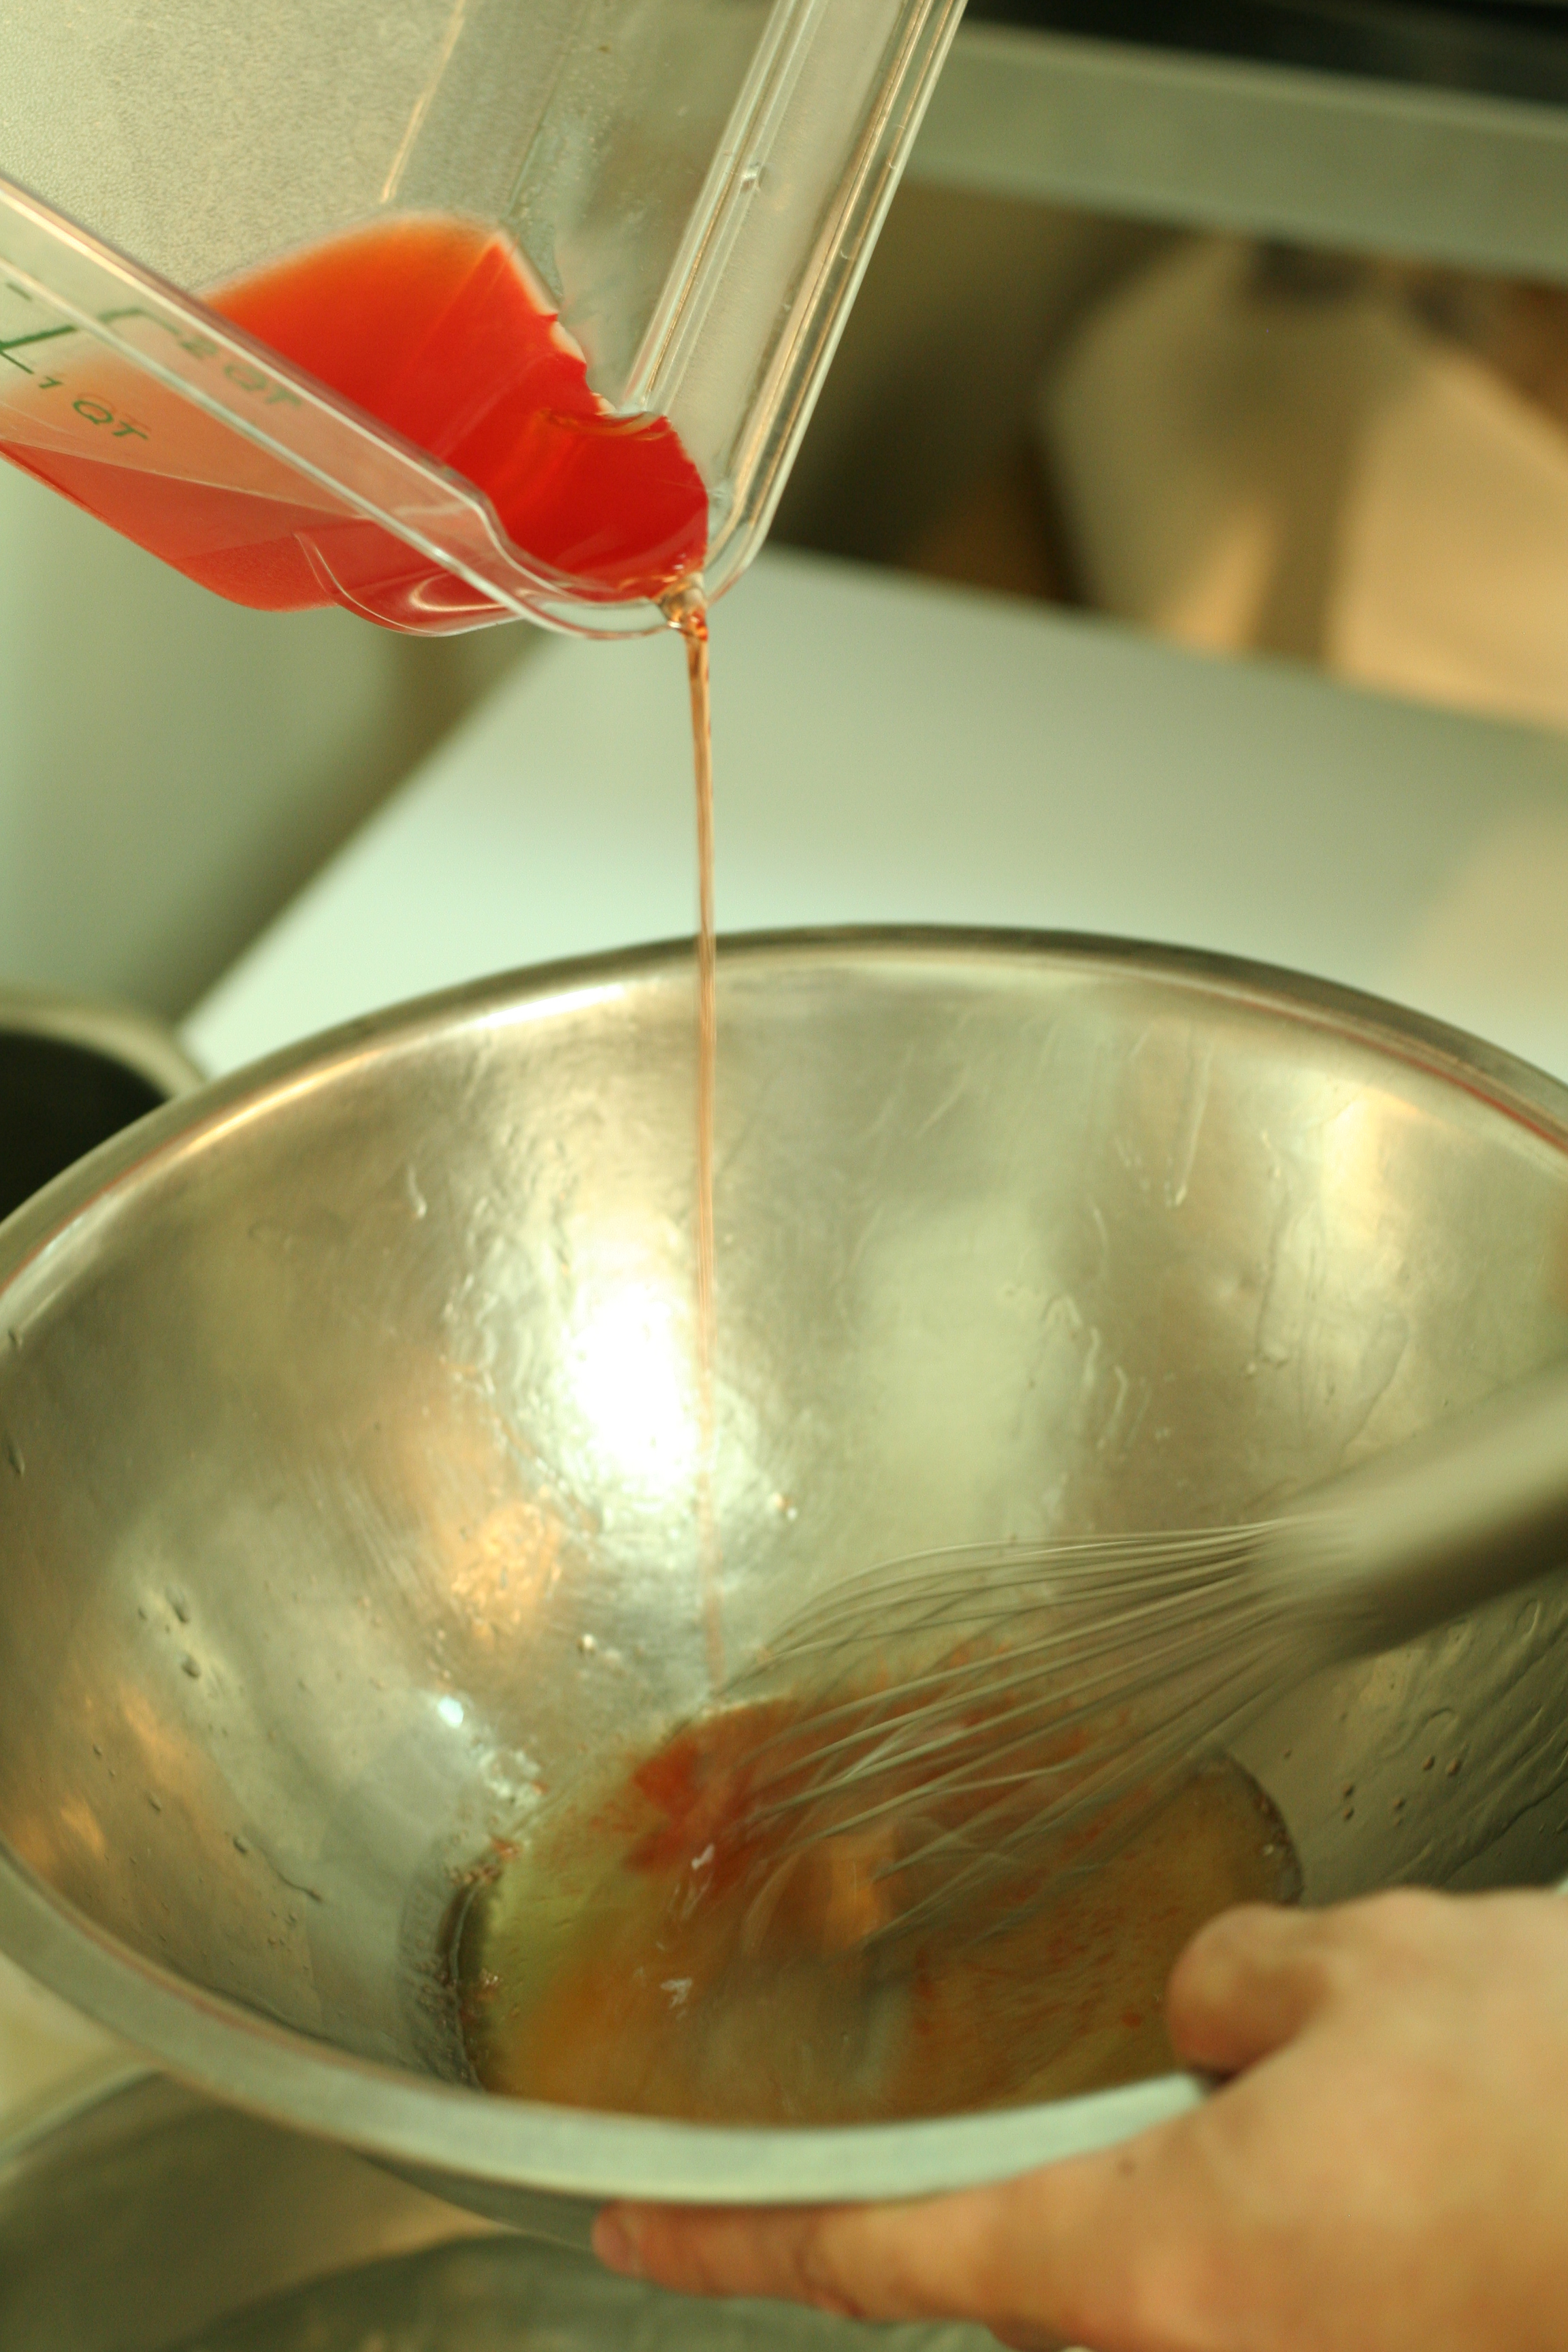
Dave set to work and dissolved glycerin flakes into lemon oil heated above 60°C. Agar was dispersed cold into red wine vinegar sweetened with simple syrup, then boiled to hydrate. The mixture was chilled over an ice bath where the oil began to separate and rise to the top. Dave scraped a spoon through the cold, cloudy oil, down to the grainy red agar-vinegar that had settled to the bottom. He rinsed the mixture with hot water to wash away the lemon oil and then dried it by gently rolling it in a paper towel. It looked exactly like and had the mini crunch of tobiko, but was sweet and tangy like vinaigrette.
Since then, we’ve made several successful and unsuccessful attempts, and through trial and error, we’ve figured out a few important factors to reproducing tobiko.It’s important to use hot tap water to rinse the tobiko—rinsing it for too long washes out some of the flavor, so hot water works best to quickly wash off the oil. The lemon oil also imparted a noticeably better flavor to the tobiko than when we substituted grapeseed oil. We also found that reducing the vinegar-syrup mixture to concentrate the flavor helped combat both the flavor and color washout during the rinse phase, but that the agar didn’t hydrate well this way. To correct for this, Dave dispersed and hydrated the agar in a small amount of water and then added the heated, reduced vinegar mixture. This seems to work best so far.
At first, Dave and I were the only ones able make tobiko even though we communicated how to do it to several different, skilled people. Dave knew what approach he wanted to take and managed to create the tobiko out of sheer luck. When it was my turn, I followed his instructions verbatim—down to the order in which I mised out products and the exact size of the bowl he had used. Of course, this recipe would not be so useful if only Dave and I understood what it meant. Luckily, Dave played with the process and wrote a working recipe so that now you, too, can create your own tobiko caviar. Please let us know when you do!
Agar Tobiko
1 g Mono & Diglycerides, aka Glycerin flakes (2% of oil)
50 g Lemon oil
100 g Concentrated vinegar mixture (any vinegar + simple syrup, reduced until flavor is concentrated)
1.5 g Agar agar (1.5% of sweetened vinegar + water mixture)
50 g Water (cold)
1. Add glycerin flakes to lemon oil and heat in a medium-size bowlto above 60°C to dissolve, stirring occasionally. Set aside.
2. Bring sweetened vinegar to a boil simultaneously with Step #3.
3. Stir agar into cold water to disperse. Bring mixture to a boil while stirring and continue boiling until agar is dissolved.
4. Stir boiling, sweetened vinegar mixture into boiling agar + water mixture. Bring combined mixture back to a boil.
5. Whisk mono & diglyceride oil mixture rapidly while drizzling in vinegar mixture to emulsify.
6. Allow mixture to cool in bowl under observation, occasionally tilting bowl side-to-side to check size of agar beads. If beads are too big and are clumping together, make sure to whisk. However, over-whisking will create beads that are too fine.
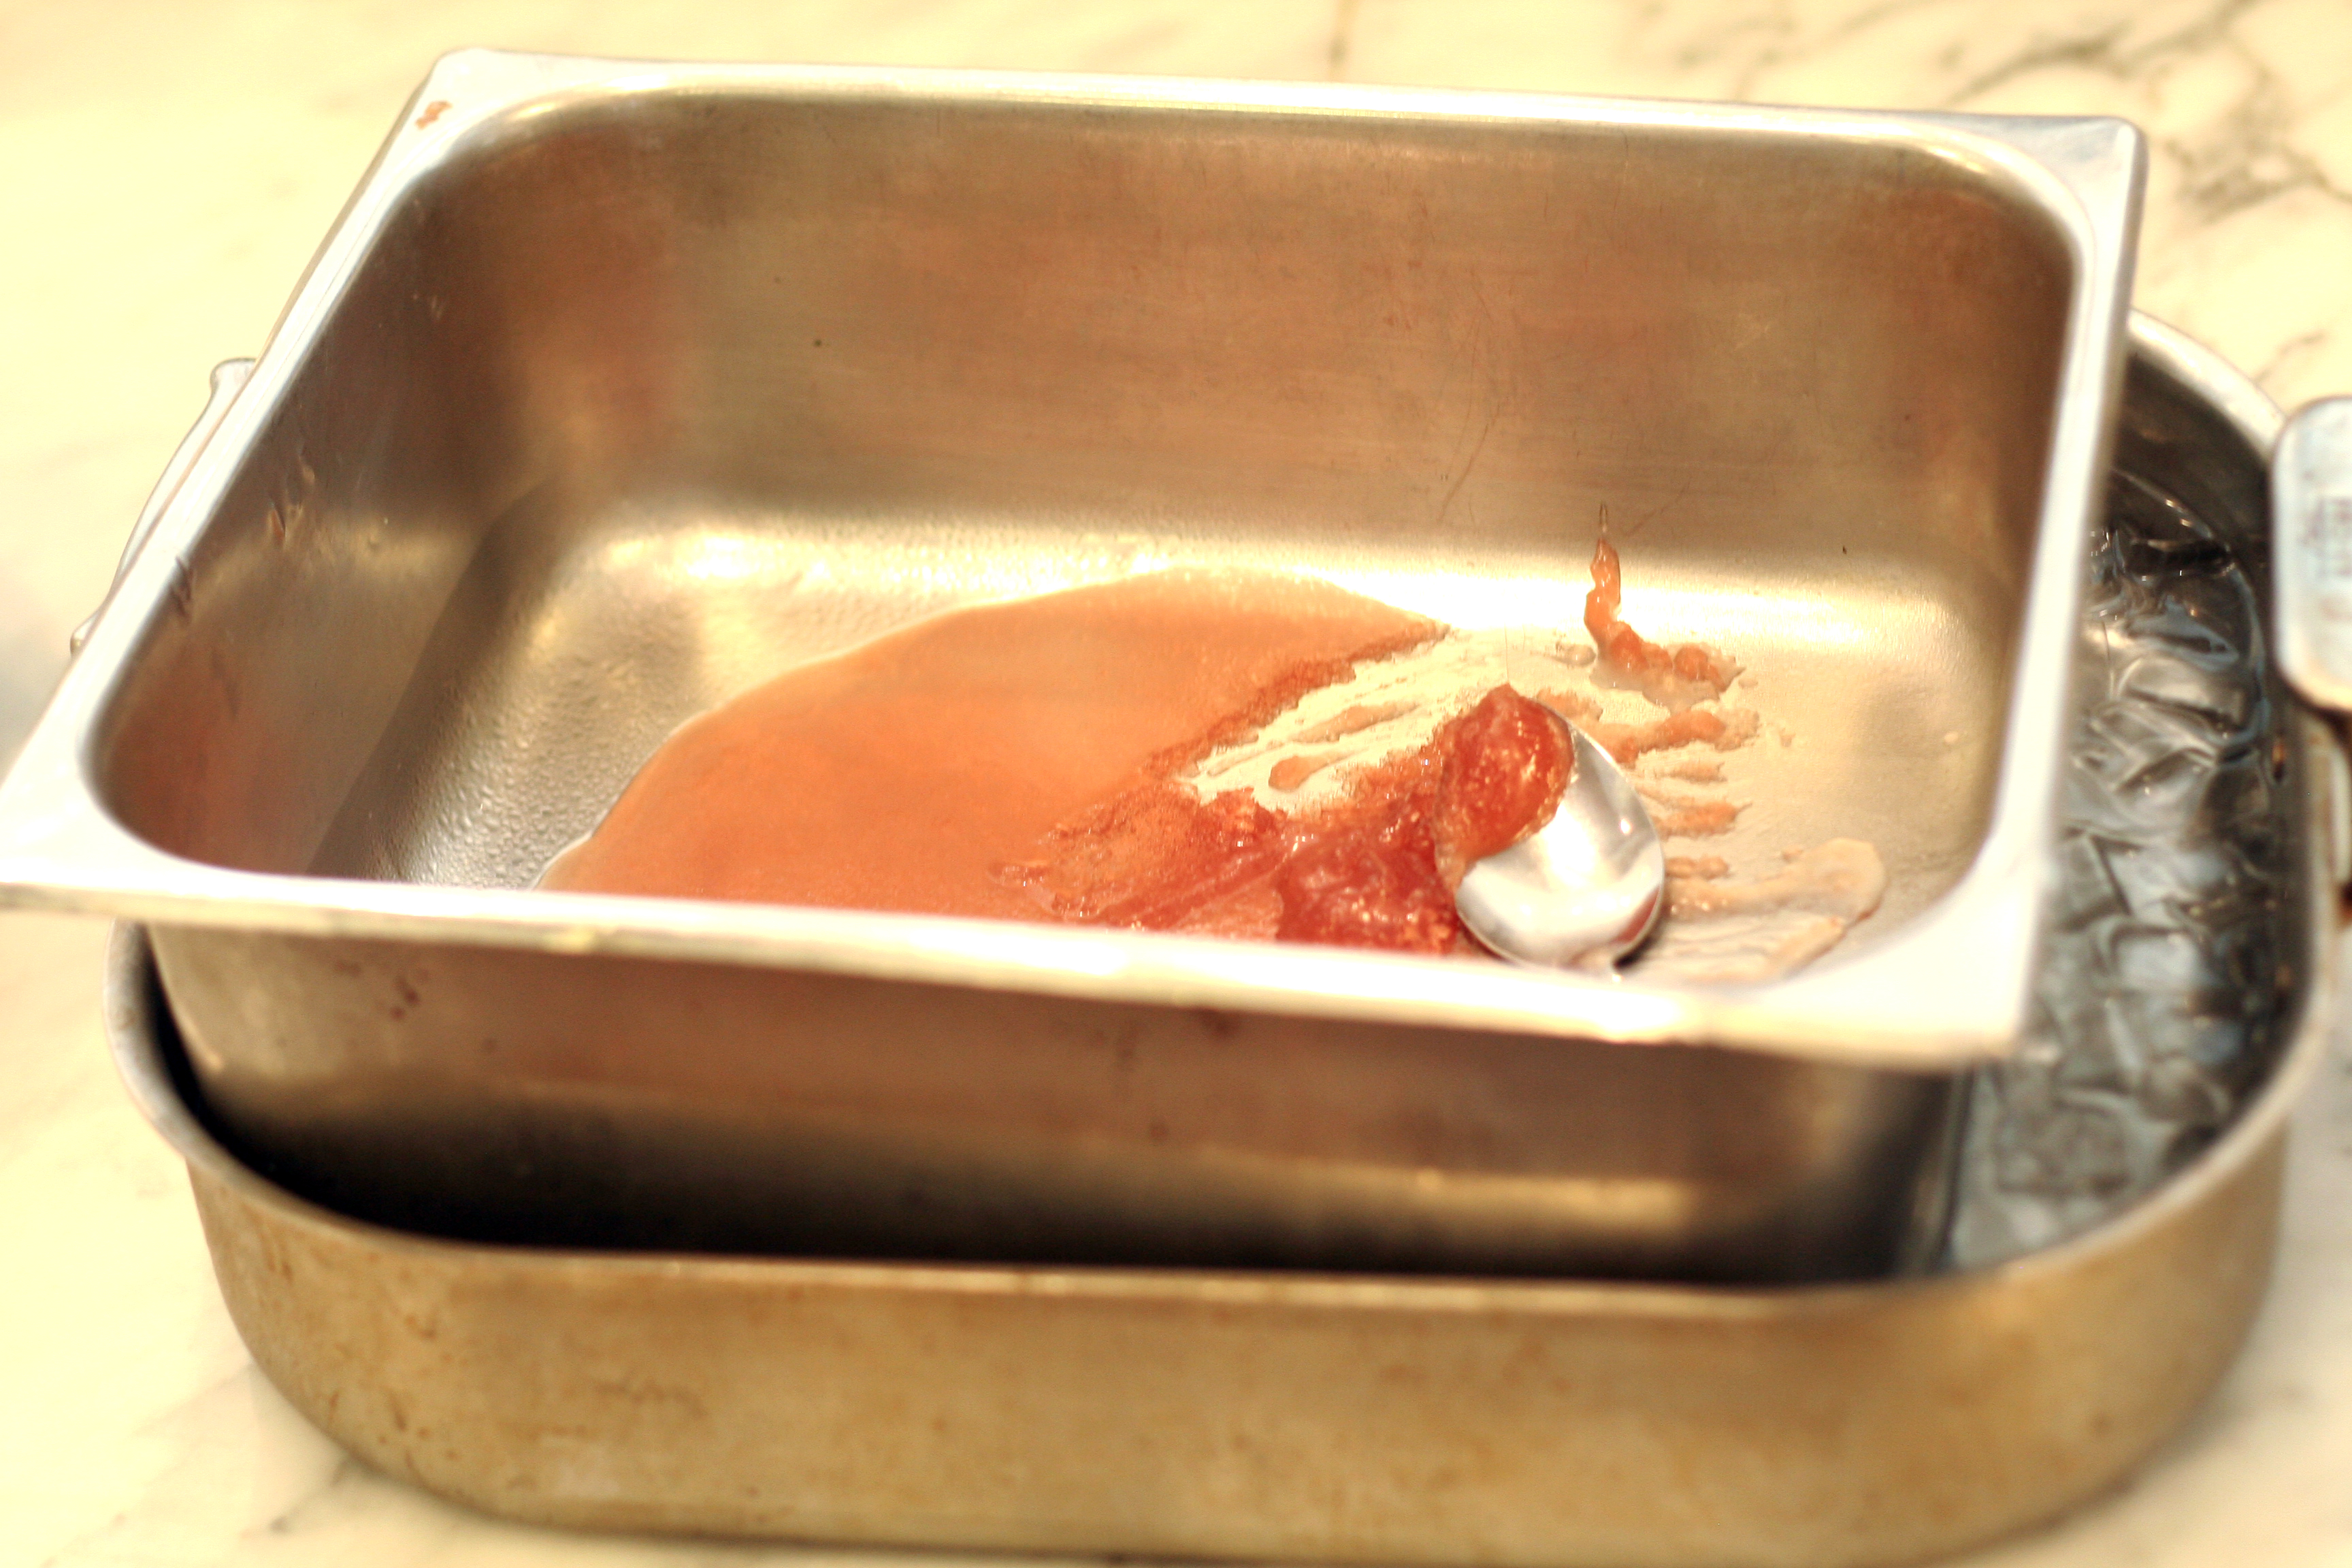
7. When agar beads reach the desired tobiko size, quickly poor out mixture into a hotel pan over ice in a thin layer to set agar as quickly as possible.
8. When agar beads are set, place tobiko mixture in a fine chinois and rinse quickly under hot water. Gently drain and dry with paper towels.
Posted by Mindy Lvoff
One day, if you’re me, you wake up in a panic and realize that despite doing all the “right†things by your very strict Asian parents, you’re miserable. Somehow the Ivy League education, the Wall Street finance job, and the pretty shoes aren’t cutting it for you. Ok, maybe the shoes are great, but the job that comes with those shoes just isn’t cutting it. So what do you do? You quit your job (it took me two years of feeling like this to get there—I’m not very quick) and decide that you’re going to do something that makes you happy. Apparently, what makes me happy is being Igor to The French Culinary Institute’s resident mad scientist, Dave Arnold. And I call him the crazy one…
What’s even crazier is the growing “Dave Arnold Fan Club†that seems to be out there! The other day, a friend brought his friend to my apartment for brunch. This friend-of-a-friend (FOAF) looked at me wide-eyed and said, “I saw your boy Dave in Esquire magazine.†I smiled and made some joke about Dave being a genius, which is both true and ironic. Then FOAF looked at me wide-eyed and wide-grinned and said, “Yeah, I Googled him and there are some great articles! What’s he like? Is he crazy? Is he nice? Is he really smart?†The questions went on and on. Forget the food that I had cooked. Hearing about Dave Arnold became the best thing about my brunch for this guy.
Everyone wants to know what he’s like. People love the picture of him attacking the TIME magazine camera with his cordless drill/hand mixer/outboard motor. They get a kick out of it when he calls a cocktail “f*ing sexy.†And I’m sure they’ve seen the article that has my favorite nickname for Dave: Dr. Delicious. He hates it. We love it. I once had a bartender whimsically say, “Wow, you work for Dave Arnold? I would give anything to be able to work with him for a day…†To which I replied, “Huh?†If I were enterprising, I’d trade places with people for a day and charge them some sort of fee to do my job.
Well, here in Igor’s Corner, I’m going to try and give you a glimpse of what it’s like to actually work with Dave… genius aside. This little section is dedicated to capturing his personality and giving you the opportunity to experience the hilarious chaos that is working within-splash-distance of Dave. This is where you get to understand why former interns can never break free of coming back to hang out with Dave on their one free afternoon a week (that means you, Nick). You’ll understand why everyone who’s ever worked for Dave has a connection with each other—why we become family. Dave is your crazy professor/dad/uncle/brother/toddler. There’s a little something insane there for everyone.
Yes, I’ll be honest—it’s exciting and humbling, but never discouraging, to work with him. It’s also incredibly challenging… and not just academically speaking. Geniuses operate outside of normal convention. Where you might see the importance in something like returning library books, Dave can’t be bothered. This isn’t a joke—in his life, Dave has almost suffered serious consequence from overdue library books no less than three times. He blames overdue library books for not being a martial arts superstar right now. Putting things away is also something that falls by the wayside. He’s been known to look around after destroying a kitchen (copper piping here, piece of cheese there, etc.), close his eyes, and wave his hand back and forth saying, “Make clean. Make clean right now,†as if trying to will the room into cleaning itself. Actually, he does this until someone (intern) reads his subtle cues and gets to work.
So first primer on Dave: if there’s a piece of equipment that we want but it doesn’t exist or it’s too expensive to buy, he’ll just MacGyver his own out of a whisk, some rice, and a penny. I’m sure most people have seen the immersion blender that he combined with a cordless Ryobi drill… It sounds like you’re revving the engine of a Smart Car. If you run it in a heavy pot filled with water, it will actually suction so strongly to the bottom that you can lift the entire pot of water into the air for a good 10-20 seconds. And let’s not forget about everybody’s new favorite: the Red Hot Poker.  Oh, and the night before our Sous-Vide Intensive class, he decided to build his own deep fryer.  He coiled his a heating element to custom-fit a large, commercial kitchen pot, and added on a thermocouple.  He then had a former intern (who just came by to say hi) strip wire and gut out most of a surge protector for him so he could use it to both power the heater and hold a digital display to show and control the temperature.  Yeah, he could have bought one, but it would be EXACTLY what he wanted and he would have ripped it apart and rebuilt it anyway.  This way, he probably spent about $20, recycled, and got a deep fryer that he wanted that’s also easily portable – it just needs a pot and an outlet.

Dave has been known to saw off copper piping in The FCI hallways. If you ask him what he’s doing while sawing, welding, drilling, etc., he’ll most likely mumble back at you, “cooking.†He has a milling machine that he uses on polycarbonate, which throws flakes of plastic that look like snow everywhere. He once emerged from his milling workshop covered in this fake snow (in his eyebrows, eyelashes, and ears) with a spelunking headlamp strapped to his forehead. Apparently the lightbulb in his workshop had blown out and he just happened to have the headlamp handy…
So I don’t know why I’m still surprised that my best friend and I ended up bolt-cutting metal rods after going to L’Ecole, The FCI’s restaurant, for lunch the other day. It seemed harmless enough—I just wanted to introduce her to Dave and take a Skoaling picture. Unfortunately, the lighting for the Skoal pictures wasn’t mounted yet. Dave had already hand-measured, cut, taped, and lined his own soft-boxes to house his 1 ft light bulbs, so I thought we were pretty safe at this point. When my friend Angie told Dave that he could just buy mounting for the boxes, he quickly laughed at her and started commanding her to find a pair of bolt cutters. Later, Angie commented, “It’s brilliant really. He never ‘asks’ you to do anything, he just kind of looks around frantically and exclaims that he needs ‘someone’ to do ‘something’ until you feel compelled to help.†Finally, someone gets it. Someone finally understands why I came to say hello and ended up 8 feet in the air on a ladder, in heels, tossing nylon strips over an air duct so Dave could mount lighting in our new kitchen.

Posted by Nils Norén
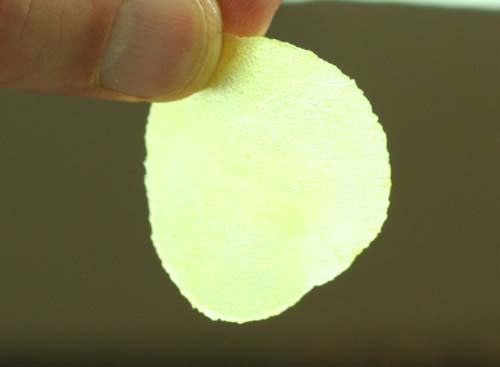
I have quite a few flavor combinations that I like. Some not so obvious: red beets and coconut. Some more common: apples and curry. I am always trying to find different ways to get my favorite flavor combinations into a dish. The combination of flavors can taste very different depending on which state the product is in. Cooked apples taste different from raw apples, and clearly the texture is very different.
When I was thinking about the dish I wanted to make for Taste of the Nation event tonight, I decided I wanted to go with apple and curry, but I did not want to serve a cooked apple. So I thought the best way to go about it would be to use a technique that we use quite often, vacuum infusion/flash pickling. We have made plenty of products this way, such as martini cucumbers and pickled onions.
Since curry is not soluble in water, we use curry oil instead. Grape seed oil is slowly heated with curry powder. The apples are sliced thinly and placed in water containing ascorbic acid to prevent browning. The apple slices are dried and placed in a container with the curry oil. That container gets covered with plastic wrap poked with a few holes, and then goes into the vacuum machine. We suck a full vacuum and when it reaches a full vacuum plus 25 seconds, we turn the machine off. We let it sit for about 20 minutes to get all the air out of the apples. Then turn the machine back on to infuse the apple with the oil. What is so great about this technique is that the apple doesn’t taste greasy. It becomes almost like edible vinaigrette.
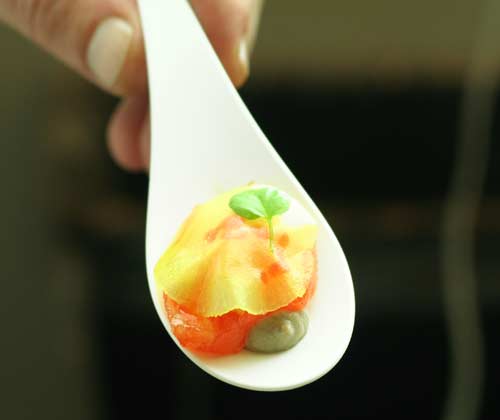
The dish that I’m using the curried apples for is Smoked Trout with Morel-Cauliflower Puree, Trout Roe, and Brioche Croutons.
Posted in Apple CurryTagged flash-pickling, vacuum infusion
Posted by Mindy Nguyen
On Monday, Nils participated in the Experimental Cuisine Collective’s symposium, “From Science to Sensation,” discussing how and where science and food intersect. If you’re following us here on the blog or have had the pleasure to dine on a dish that Nils has prepared, then you no doubt have an appreciation for not just the innovation behind each of his creations, but also for the design of his platings. In his hourlong presentation, “An Interdisciplinary Approach to Technology, Design, and Food,” Nils shed light on how science and technology have inspired him to constantly challenge himself to be innovative with flavors, textures, and aesthetics.
Transglutaminase (aka “meat glue”), hydrocolloids, immersion circulators, vacuums, etc. have all allowed Nils to take classic flavor combinations and improve upon them. These technologies have not only enhanced how food tastes, but how it feels and how it looks as well. Yes, the use of the products has revolutionized the outcome of food, but Nils stressed that it has also changed the way he thinks about food in general. Once you can challenge one formerly long-held notion of what you can and can’t do with food, then you can begin to think about what other “rules” you can break. Nils used dishes and cocktails that he has prepared for his ongoing collaboration with the Philip Johnson Glass House Conversations salon series to demonstrate some of his favorite food technology applications.
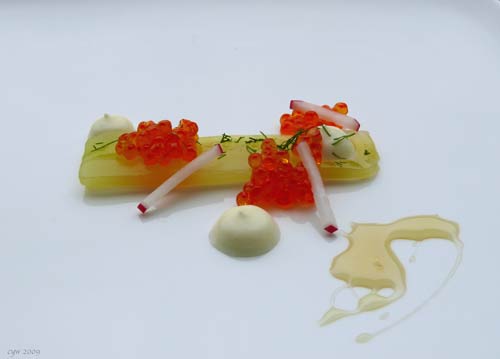
Take for example a classic Russian dish: pickled cucumbers, smetana, and trout roe. Instead of traditional pickle, why not try and preserve the crunch and freshness of the cucumber flavor while also enhancing it with all the best flavors of a pickle? He flash-pickled cucumber planks in the vacuum, allowing the natural sweetness of the cucumber to partner with the tangy flavors of the pickling liquid. An added benefit is that instead of a yellowish, graying pickle, you end up with a translucent, spring-green cucumber plank that looks almost like a molded gel. For the trout roe, Nils returned to a rule that he had broken long ago—he marinated it in yuzu and soy sauce. When he first had the idea to marinate roe with citrus, everyone said that it couldn’t be done, that the citrus have the same impact as it does on fish, essentially “cooking” it. Instead of just accepting conventional wisdom, he decided to try for himself to see the outcome. It turned out that the yuzu and soy seeped into and infused the roe while also firming the roe membrane. The stained-glass cucumber topped with vivid marinated trout roe combine with the homemade smetana beautifully, both palate-wise and visually.
Another example that Nils not only spoke about, but allowed the audience to sample for themselves, was the impact of clarification. He and Dave are obsessed with clarification, partially because of their love of carbonation, which benefits from an absence of debris—think about a pulpy mimosa and how you get that unpleasant, foamy layer at the top. And of course, crystal clear liquids are usually a little more pleasing to the eye. Nils and Dave use a number of new technologies to clarify different liquids: gelatin-clarification, enzyme-clarification, rotovap distillation, etc. Everyone in the audience was allowed to experience an FCI house-favorite for themselves: Gin n’ Juice. It’s a little different than the Snoop Dogg version. Nils and Dave clarify grapefruit juice using gelatin, and then combine the crystal clear juice with gin and a little simple syrup before self-carbonating the beverage. It’s almost hard to place the grapefruit flavor in this cocktail because there’s no bitterness. The clarification process not only results in a clean, sparkling appearance, but it also helps to highlight flavors from the grapefruit that might otherwise be masked by its characteristic bitter notes.
Nils was passionate about encouraging the audience to see technology as a way to unlock doors to culinary innovation. He encouraged chefs, scientists, and students in the room to not only think about how to improve the flavors they already understand using new technologies, but to also use modern thinking to find alternative methods of using old technologies. He ended his discussion by highlighting this blog as a way for him and Dave to share their ideas and discoveries with the food and science community. Nils and Dave are extremely proud of their roles as teachers at The French Culinary Institute, and they hope to not only give their own students the benefit of their experience, but to also be a resource for all chefs and the industry as a whole.
Posted by Dave Arnold
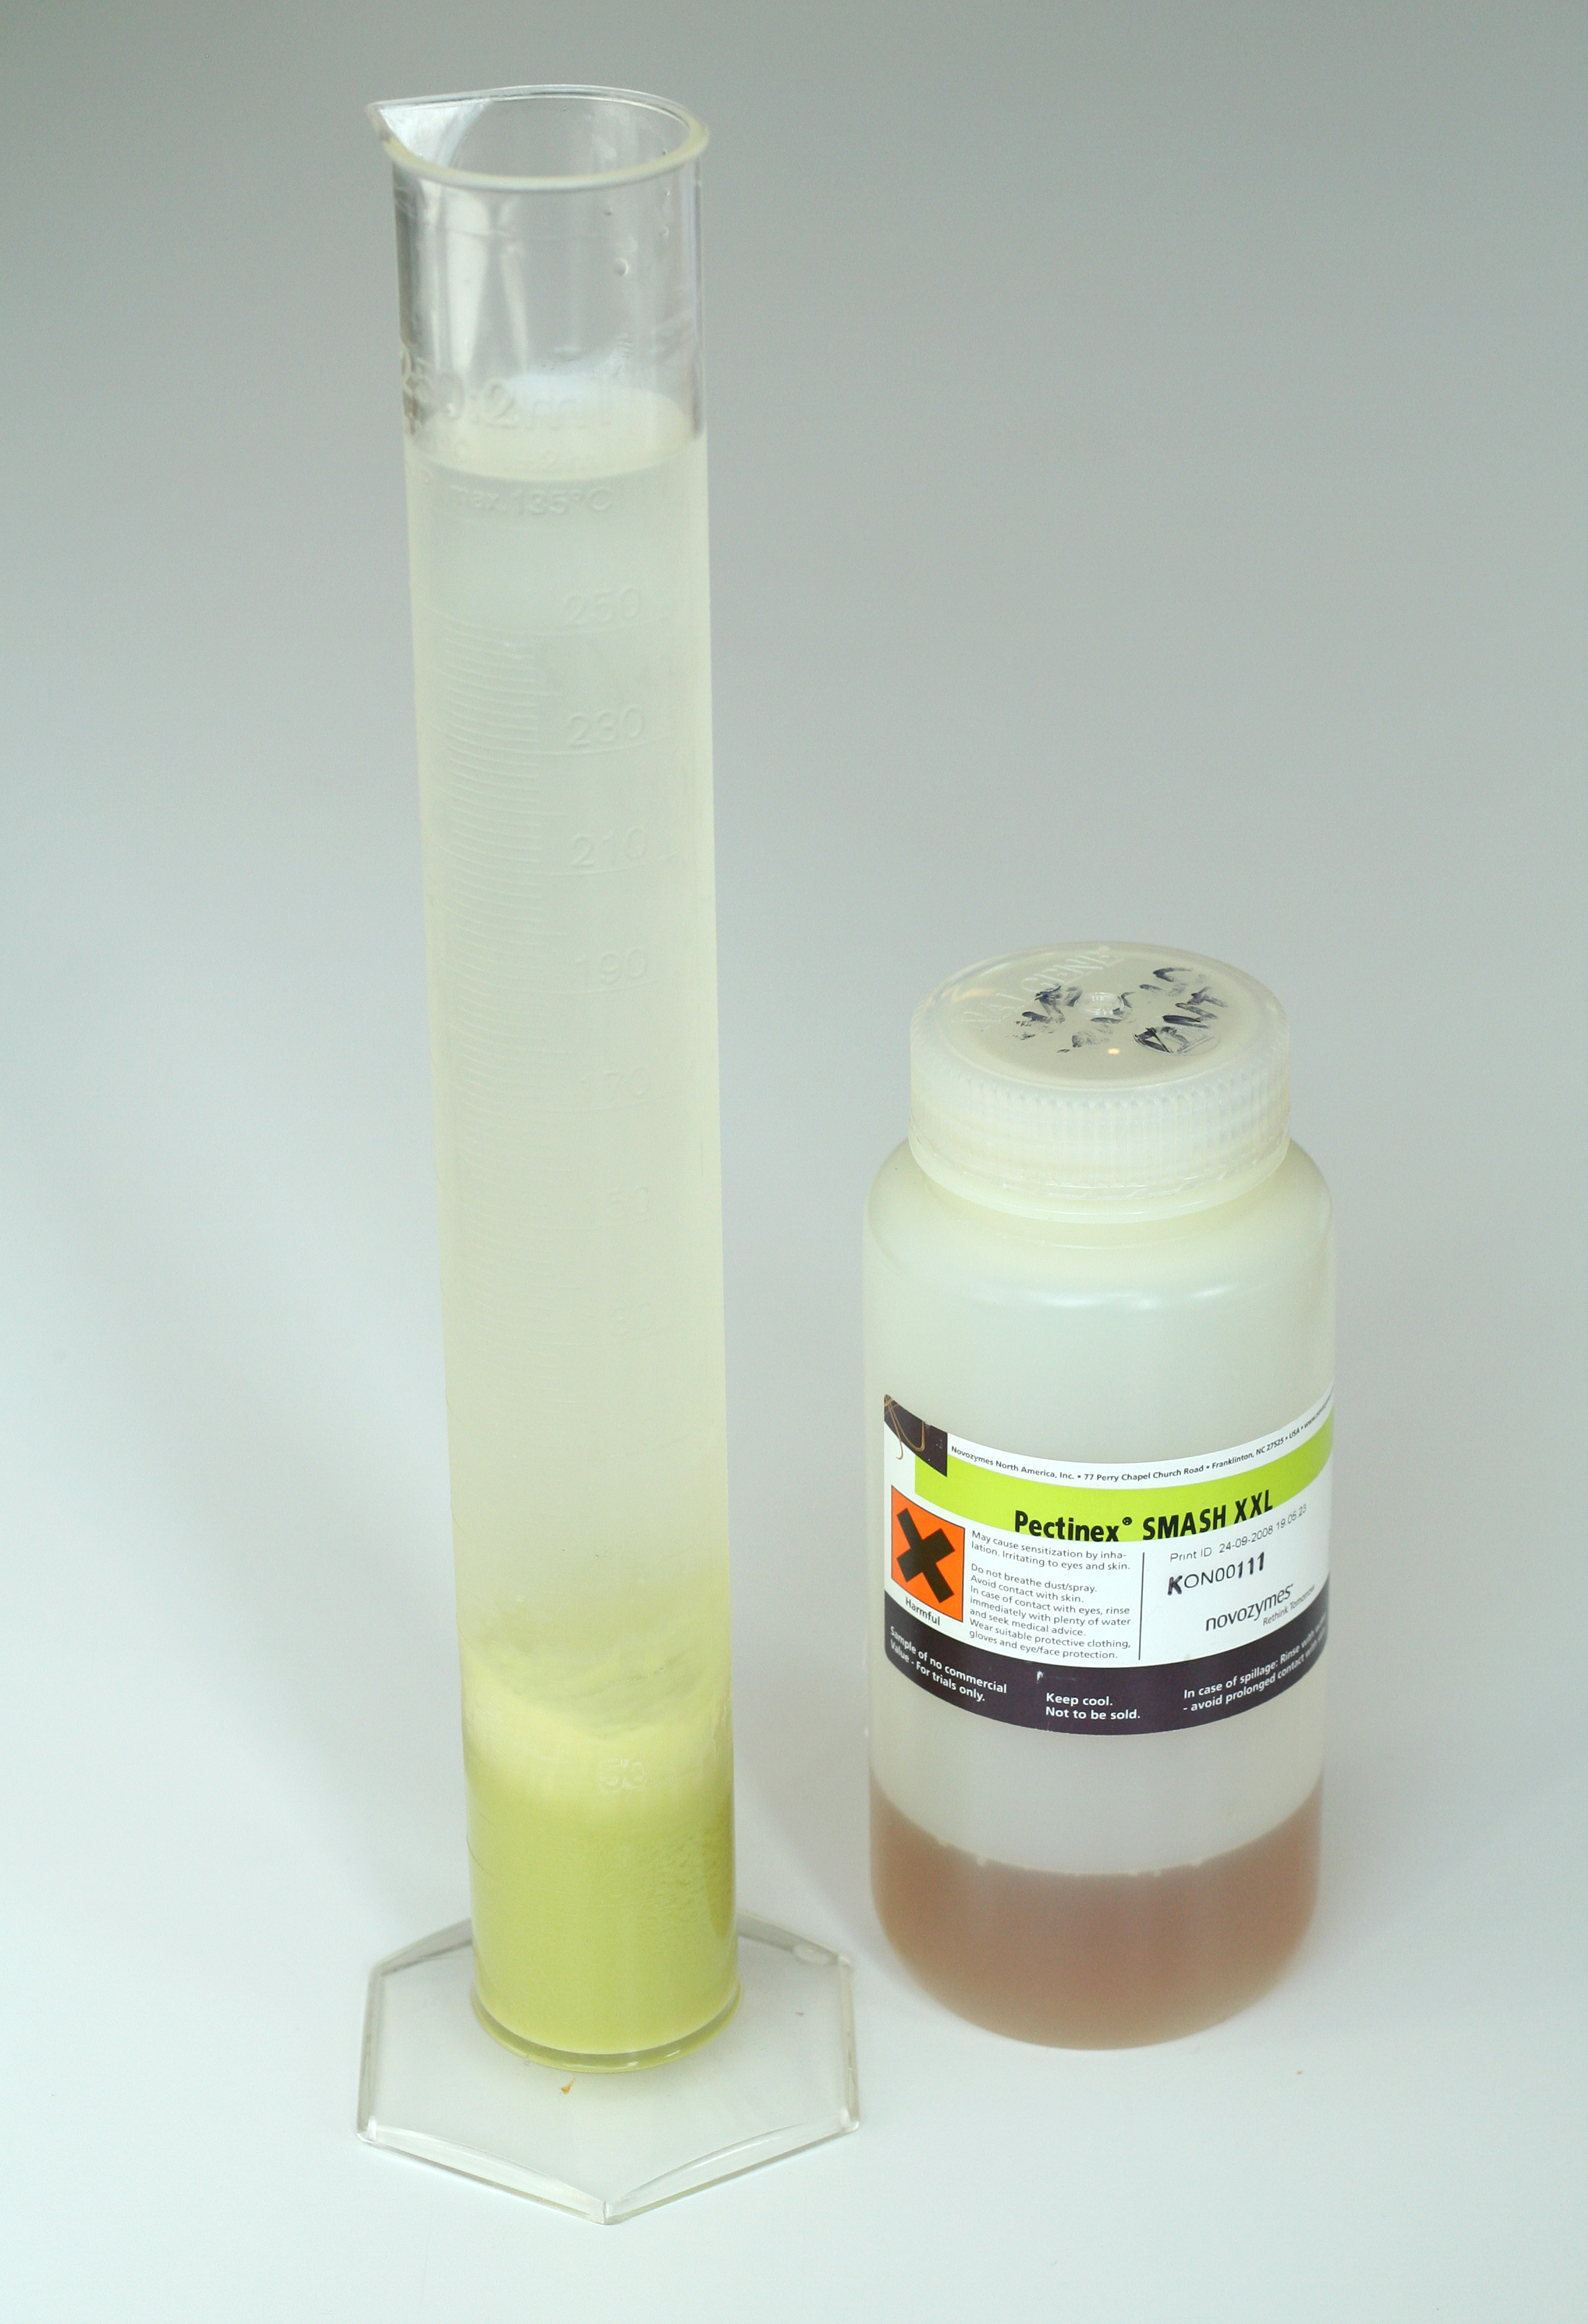
Chadzilla had a good question about enzyme clarification: What is it? Many fruit juices, like apple and cucumber juice, are cloudy because of particles stabilized by pectin. You can use enzymes, like pectin lyase, to break down those pectins. We use a brand called Pectinex Smash by Novozymes. Simply add 1-2 grams of enzyme per liter of juice, stir, let sit overnight, and decant the clear liquid off the top. Don’t use a square container. Rotating a square container kicks up a lot of particles. The particles are so small they will go through a coffee filter, so be careful. We use the enzyme because it is convenient, easy, and gets a higher yield than gelatin or agar clarification. We especially like it with apples. A couple of chefs use it in their menus—my friend Johnny Iuzzini for one. As far as I know, Nils and Wylie were the first chefs to play with it years ago at an international food technology conference in Oklahoma. The only problem with the enzyme is it cannot tolerate extremely low pH, such as sour orange juice. By the way, when we get our centrifuge up, our clarification time with enzyme will go down to about 20 minutes and our yields will go up to something like 95%!
Posted in AgarTagged enzyme clarification
- About
- SKOAL!
- Primers
- Press
- Radio
Last Sunday we had a skåling party here at the school. Post and photos next week. This week we have:
A blogger:

A television producer:

Some chefs:
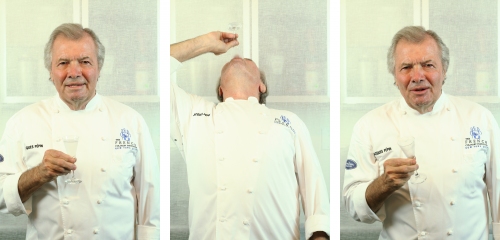

And, to analyze their skåls:
Posted in skoalTagged skoal
Post navigation
← Previous Post
Next Post →
One thought on “SkÃ¥ls of the week 5.22.09”
- AJ says: May 22, 2009 at 7:55 pm
I hope to see a book soon!
Comments
Posted by Mindy Lvoff

If you missed Dave and the tech team Thursday night at ISI’s Sugar and Whips event, then you’re in serious need of a “Vitamin G” infusion: house-carbonated, celery-infused Tanqueray gin mixed with fresh-squeezed sour orange juice (I dare you to challenge Dave to a citrus-juicing contest), Dolin’s Blanc Vermouth, and a touch of simple syrup, lime acid, and salt. Most of the gin that he used was vacuum-infused with roughly 800 grams of celery, thinly sliced against the grain, then strained through a coffee filter. A portion of the gin was blended with celery in the Vita Prep then rotovap-infused. It takes a lot longer to infuse this way and requires a little more water-balancing afterwards because of the high-proof, but the product is crystal clear and takes on an aromatic-celery flavor with less, earthy vegetal notes.
Each liquid-nitrogen-chilled champagne flute was filled with Vitamin G before being topped off with a thinly sliced ginger chip, achieved using none other than the Hobart 3000 slicer. Paper-thin ginger sheets were blanched in simple syrup before being dehydrated until delicately crisp. Ginger on a gin and sour orange juice cocktail—definitely fulfilling your daily Vitamin G requirement.
If you’re interested in learning more about high-tech cocktails from Nils and Dave directly, check out the upcoming 2-hour High-Tech Cocktails class offered by The FCI’s Recreational Division.
Posted by Mindy Nguyen
Sometimes we get lucky, or maybe it’s more than that. Maybe if you’re good to your students, your students will be good to you. Well, a former Sous Vide Intensive student, Alan Slesinski, seems to be of that last mindset and he just happened to have an old centrifuge that he was looking to give away.

Actually, he’d been trying to give it to us since last fall, but with all of our hectic schedules, last Wednesday was the first time that we were finally able to pick it up. One of my many hats just happens to be Tech Team chauffeur, so I was in charge of arranging transportation for Dave and my excursion to Unilever in New Jersey to retrieve our new toy. Dave only had one request, which I ignored: Don’t rent from UHaul. He’d had a bad experience… there’s more to it, but that’s the super-short version of the tirade. Well, I didn’t listen. Long story short, it took me two hours to get the truck and then get to Dave, who was too happy telling me, “I told you so” to care that I was late. Lesson learned. We were off to New Jersey in a truck with driver’s side door that would only open about 10″, driven by someone who was taught not to signal when changing lanes by her mom because “that way, other cars won’t know you’re coming.”

It took about three u-turns to finally find the entrance to Unilever, then I had to back the truck into two different sides of the loading dock 3-4 times until we figured out which one was the right height. But finally we were ready to load up our beautiful “new” centrifuge. New to us, not so new to the world. It’s the size of a commercial washing machine, and, if you’re a fan of LOST, it looks a little like something from the Dharma Initiative’s hatch… after it was blown up. But it works! As Alan and Dave were pushing it into the back of the truck (and learning that trying to lift the 600 pound centrifuge was not a great idea), Dave turned to me wide-eyed and ecstatic and said, “See Mindy! You just need to have a wish list! Dreams do come true!”

After we toured the incredible facilities at Unilever (and saw some amazing things that I’m not allowed to blog about—but trust us, that place has some great toys), we loaded up on snacks and headed back to the city. Dave sat in the passenger seat enjoying the sunlight and somewhat-fresh-Jersey-air (I can say that, I’m from Jersey). He seemed perfectly content, clutching the internal rotor from the centrifuge (too delicate to leave in the back of the truck), a Mountain Dew, and a giant black-and-white cookie. I guess dreams really do come true. Check out Dave’s post tomorrow on how he plans to “live the dream” and use the centrifuge.

Posted by Dave Arnold
This is the first of a series of posts on centrifugation that will eventually be a primer.
What is a centrifuge and why would we want one?
A centrifuge is a device that spins at high speed to separate products into parts based on density. The faster you spin it, the more separation power you get. This separation power is usually described in “g’s†(also called RCF)—the number of times the force of gravity the product is feeling.
In the kitchen we could use one to clarify juice by spinning the hell out of the juice and making all the cloudy parts slam into the bottom of the container forming what’s called a “pellet.†We could also take an emulsion, spin it, and demulsify it to remove the fat, etc.
Problems
Not all centrifuges are created equal. It isn’t useful to have a centrifuge that can’t develop the g forces needed to complete your task. A crappy knife will still cut, just poorly. A centrifuge that can’t produce adequate g forces is useless—like trying to demolish the Great Wall of China with a whiffle-ball bat.
Centrifuges are expensive (duh). The bigger the centrifuge, the more product it can handle, which means it will cost more. Small centrifuges, on the other hand, only handle small amounts of product and are, therefore, useless. Speed also factors into cost—faster spinning centrifuges can separate a wider array of products, meaning that you will need to pay for that benefit as well.
Centrifuges are DANGEROUS. The spinny part of the centrifuge is called a rotor. Rotors have a finite lifetime. They undergo tremendous forces. Being made of metal, they can suffer from fatigue over time, causing the rotor to suddenly fly apart. The slower the rotor spins, the more inherently safe it is. Rotor failure at very high speeds can be deadly. Check out these photos: 1) Purdue; 2) MIT; 3) Cornell
Don’t use an old rotor unless you know its history and it is within specifications. Also, using a centrifuge when you don’t know what you are doing is REALLY BAD. You thought your unbalanced washing machine rattled and made noise…
The FCI and Centrifugation
When we first met up with Prof Kent Kirshenbaum at the Experimental Cuisine Collective, he asked us what we wanted to play with in his lab. The top two choices were his freeze-dryer (which we still haven’t played with) and his centrifuge. We chose the centrifuge. Nils and I headed over to the lab with Johnny Iuzzini, who was also hanging out at the ECC, to check it out.
We wanted to use Kent’s centrifuge to determine:
- Is centrifugation useful.
- What type of centrifuge would we need.
The test we decided was the clarification of lime juice. Because:
- Lime juice is delicious.
- Lime juice is difficult to clarify because it has a low pH, can’t be heated, and doesn’t store well at all, i.e. has to be used same day.
- At the time we were working on clear lime juice as part of our Rotovap work.
We were hoping that:
- A small, low-speed centrifuge would work.
- We could get one cheap.
Well, that’s not how it turned out. Kent’s ‘fuge (we call them ‘fuges in the biz, pronounced like huge) is a superspeed type. Superspeeds are a step below an ultra-centrifuge, the butt-kickers of the centrifuge world. There was no point in trying an ultra-centrifuge because it would never, ever be practical in a kitchen. The rotors in an ultra undergo so much force that you have to keep track of how many hours they spin and throw them away after the hours are used up. Kent’s superspeed spins a little over 20,000 rpm. He has a couple of rotors. The two we used are the GS-3, which holds 3 liters and can spin at 9000 rpm, producing about 13,800 g’s, and the SS-34, which only holds 400 ml, but can spin at 20,000 rpm producing 48,000 g’s.
The Bad News
Obviously, we were hoping that the slow, large capacity rotor would do the trick. If low-g forces worked, we could get smaller, cheaper, fuges to use in the kitchen (Kent’s rotors ALONE cost $5k apiece). Nope. Turns out that it takes 27,000 g’s before lime juice starts to clarify and that lime juice tastes TERRIBLE and metallic. If you up the centrifuge to 48,000 g’s the lime juice is crystal-clear and delicious. This is an extremely interesting finding but also very depressing, because it meant that only an expensive, large centrifuge would do what we want.
The Good News
Using enzyme pre-treatments, we are able clarify some juices at considerably lower speeds (but not lime yet).
The Stupid News

After working in Kent’s lab I decided to do an eBay search for superspeed centrifuges and ended up purchasing a Sorvall SS-1, the very first superspeed fuge they made. It’s from the late 1950’s. Let me just say this: BAD IDEA. We call it the dangerfuge. It has no protective casing at all – just a 50 year old aluminum rotor spinning like a bat-out-of-hell in the middle of the room. It doesn’t even have a switch, just a plug. It is the scariest piece of equipment I have ever fired up (and that’s saying A LOT) and I never intend on firing it up again. Sure, it seems fine. The whine, spin and wind coming off it are even strangely compelling; but at any moment, the rotor could fly apart sending shrapnel everywhere. As Kent says, “what you’re paying for in a centrifuge is the protective armored casing that stops the rotor from going through YOU when it fails.†True.
That’s where our centrifuge program stood until Unilever gave us a call….
Posted by Mindy Lvoff
Since we’re in the midst of our Sous-Vide Intensive class, I just wanted to post a reminder about the next Advanced Studies class that Nils and Dave are teaching. “Magic Potions: Hydrocolloids” covers the ins & outs of using hydrocolloids in the kitchen. The 2-day class starts June 25th and can only accommodate 16 students, so please sign up soon if interested.
Posted by Mindy Lvoff
Remember that “wish list” we talked about in our centrifuge post? One of our “dreams come true” was getting our liquid nitrogen dewar. People questioned whether or not we’d be able to find enough uses to justify a 160-liter dewar… Well, we have. In fact, we order refills from TW Smith every 2-3 weeks.

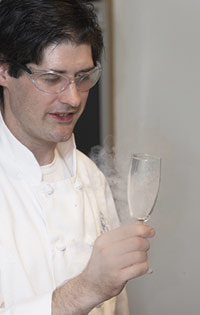
FCI Liquid Nitrogen Use #58 is chilling glasses. When you order a chilled cocktail (vs. red-hot cocktail), your bartender usually fills your glass with ice and water to chill it while he/she prepares your beverage. Your bartender then needs to dump out the ice water and, hopefully, dry out your glass before pouring in your cocktail. I would call that glass “cool,” but not “chilled.” Why dump a cold cocktail into a glass that will immediately start to raise your drink’s temperature?
The first glasses that we ever chilled with liquid nitrogen were shot glasses. Dave was doing an event at Tailor where he served 100 proof Gin & Tonic shots at negative-20°C. You can’t serve a masterpiece like that in a warm, or even cool, glass. Luckily, our friend Sam Mason stocks his kitchen with a little liquid nitrogen dewar of his own. So we lined up shot glasses in a hotel pan and poured liquid nitrogen in and over them. The glasses were frosty cold, but also needed a moment to temper back down to a tolerable lip temperature, i.e., a temp where the inside of your bottom lip wouldn’t stick to the glass when you sipped. We tried dipping champagne glasses into pots of liquid nitrogen, but that also resulted in the same stuck-lip problem. Someone (me) came up with the idea to instead pour the liquid nitrogen directly into the glasses, only chilling the parts of the glass that come into contact with the drink. Of course, Dave had to one-up me and swirl the liquid nitrogen in the glass, thereby using less and chilling the glass quicker. Here’s a very important tip: make sure that you only chill a BONE-DRY glass with liquid nitrogen, as a damp glass will crack and shatter… every time.
Then Dave came up with yet another great idea (the man has potentially deadly ideas or brilliant sparks of genius, but most are some combination of the two). He ran around the school stealing borrowing airpots, those insulated containers that you can pump coffee or free milk for cereal out of at Starbucks. It turns out that dry airpots can carry and dispense liquid nitrogen perfectly. The airpot revelation has made liquid nitrogen glass-chilling a staple of any cocktail demonstration that we now do, whether it’s here at The FCI or away at an off-site demo. It’s the fastest and most effective way to chill a glass—just don’t swirl any into your eyes. Oh, and make sure you’re always chilling two glasses at the same time, as one-handed chilling is just weak.


